Easier and quicker than the full size version, my mini quiche uses a buttery flaky pie crust and a simple 4-5 ingredient egg filling. You can add a variety of flavors and add-ins like ham, bacon, spinach, Swiss cheese, scallions, mushrooms, peppers, and more. Bake these mini quiches in a mini muffin pan and watch them virtually disappear. I absolutely love quiche and this tiny version is even better!
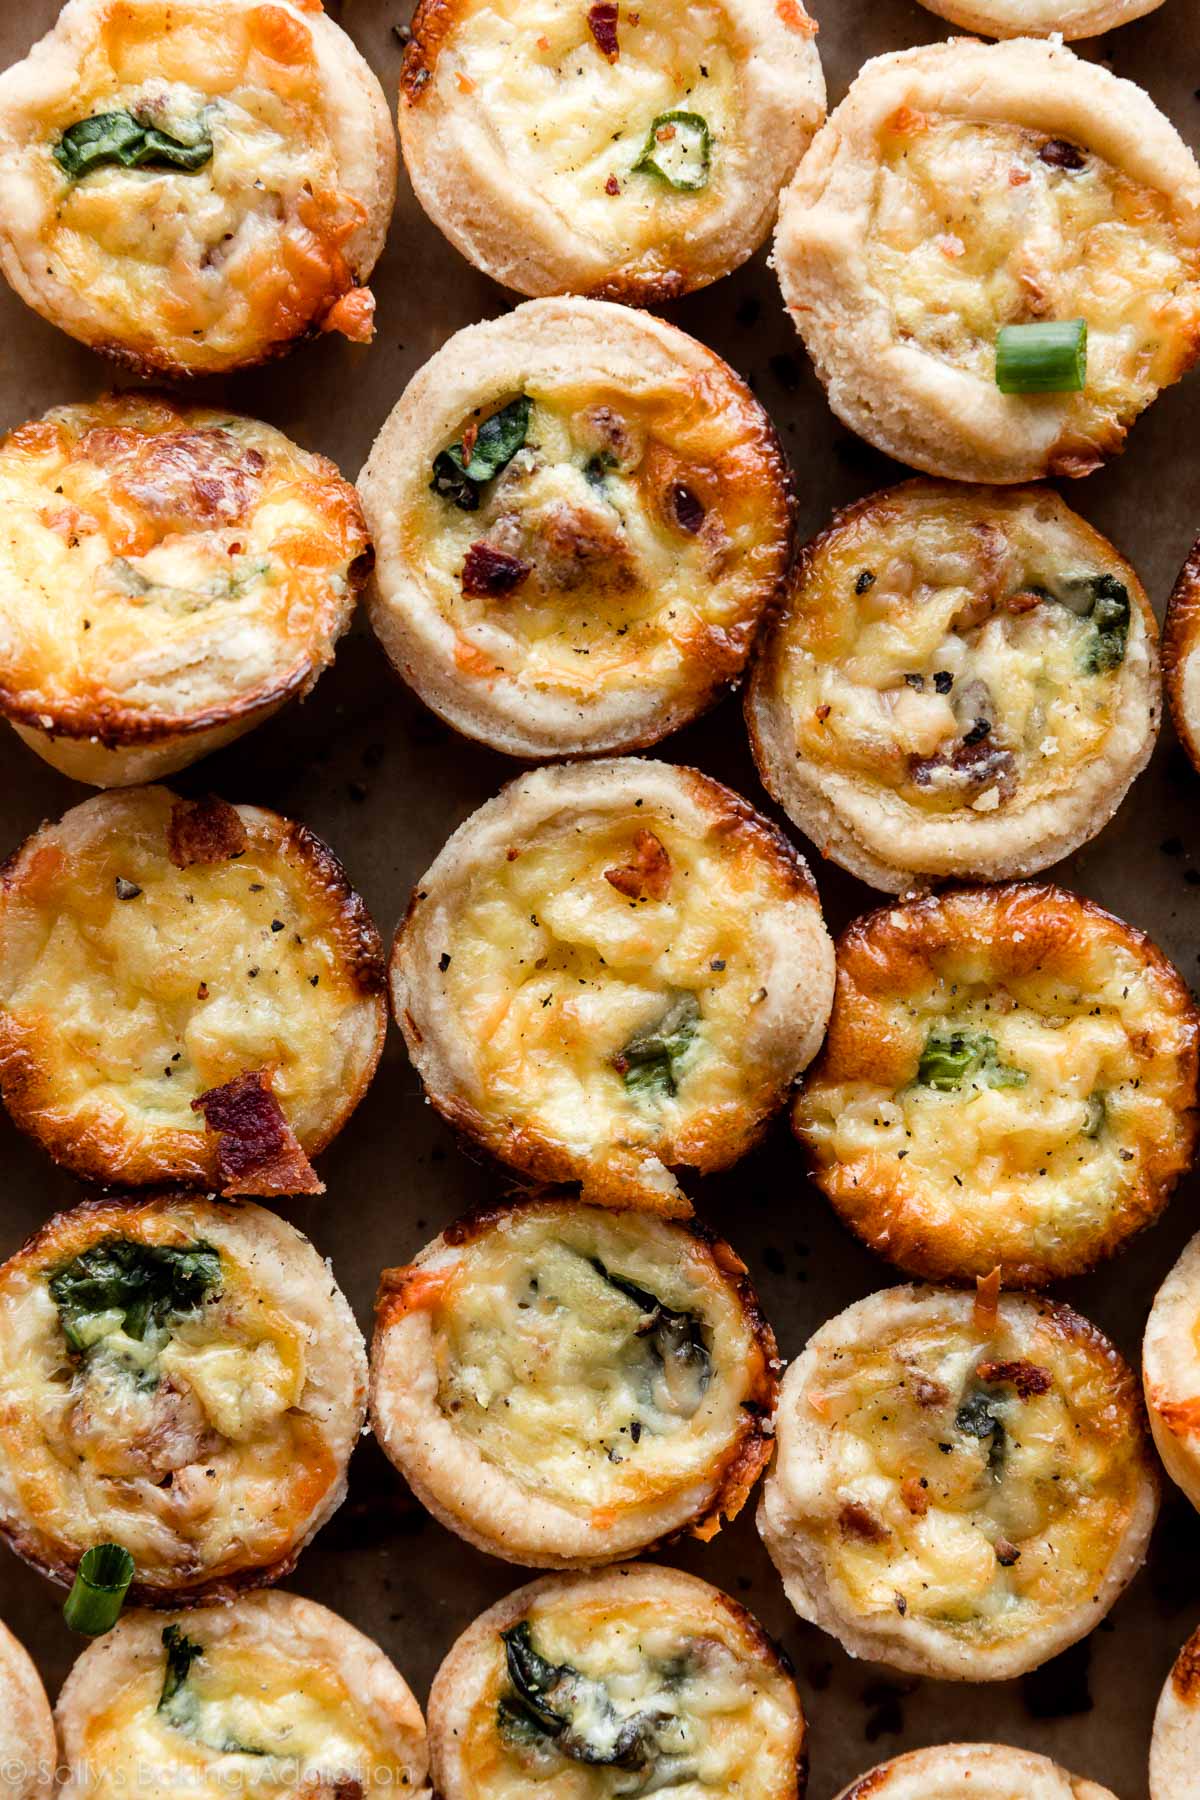
Remember my perfect ? I’ve had so many questions and requests for a mini version! Today we’re making mini quiche, a scaled down and simpler version of its full-size parent. Often underrated, quiche—no matter what size—is fantastic for lunch, dinner, Easter, baby showers, bridal showers, potlucks, tea parties, and so much more.
Even as a small family, quiche is our go-to food when we need quick and fulfilling recipe that’s delicious and adaptable to our available ingredients. As a bonus, kids love to help cutting the pie crust into mini circles. Let’s continue to get the kids in the kitchen!
Why Make Mini Quiches?
- Bite-sized
- Easier than a full quiche
- No blind-baking the pie crust
- Fun to make
- Customizable based on ingredients you have
- Easy to freeze & reheat
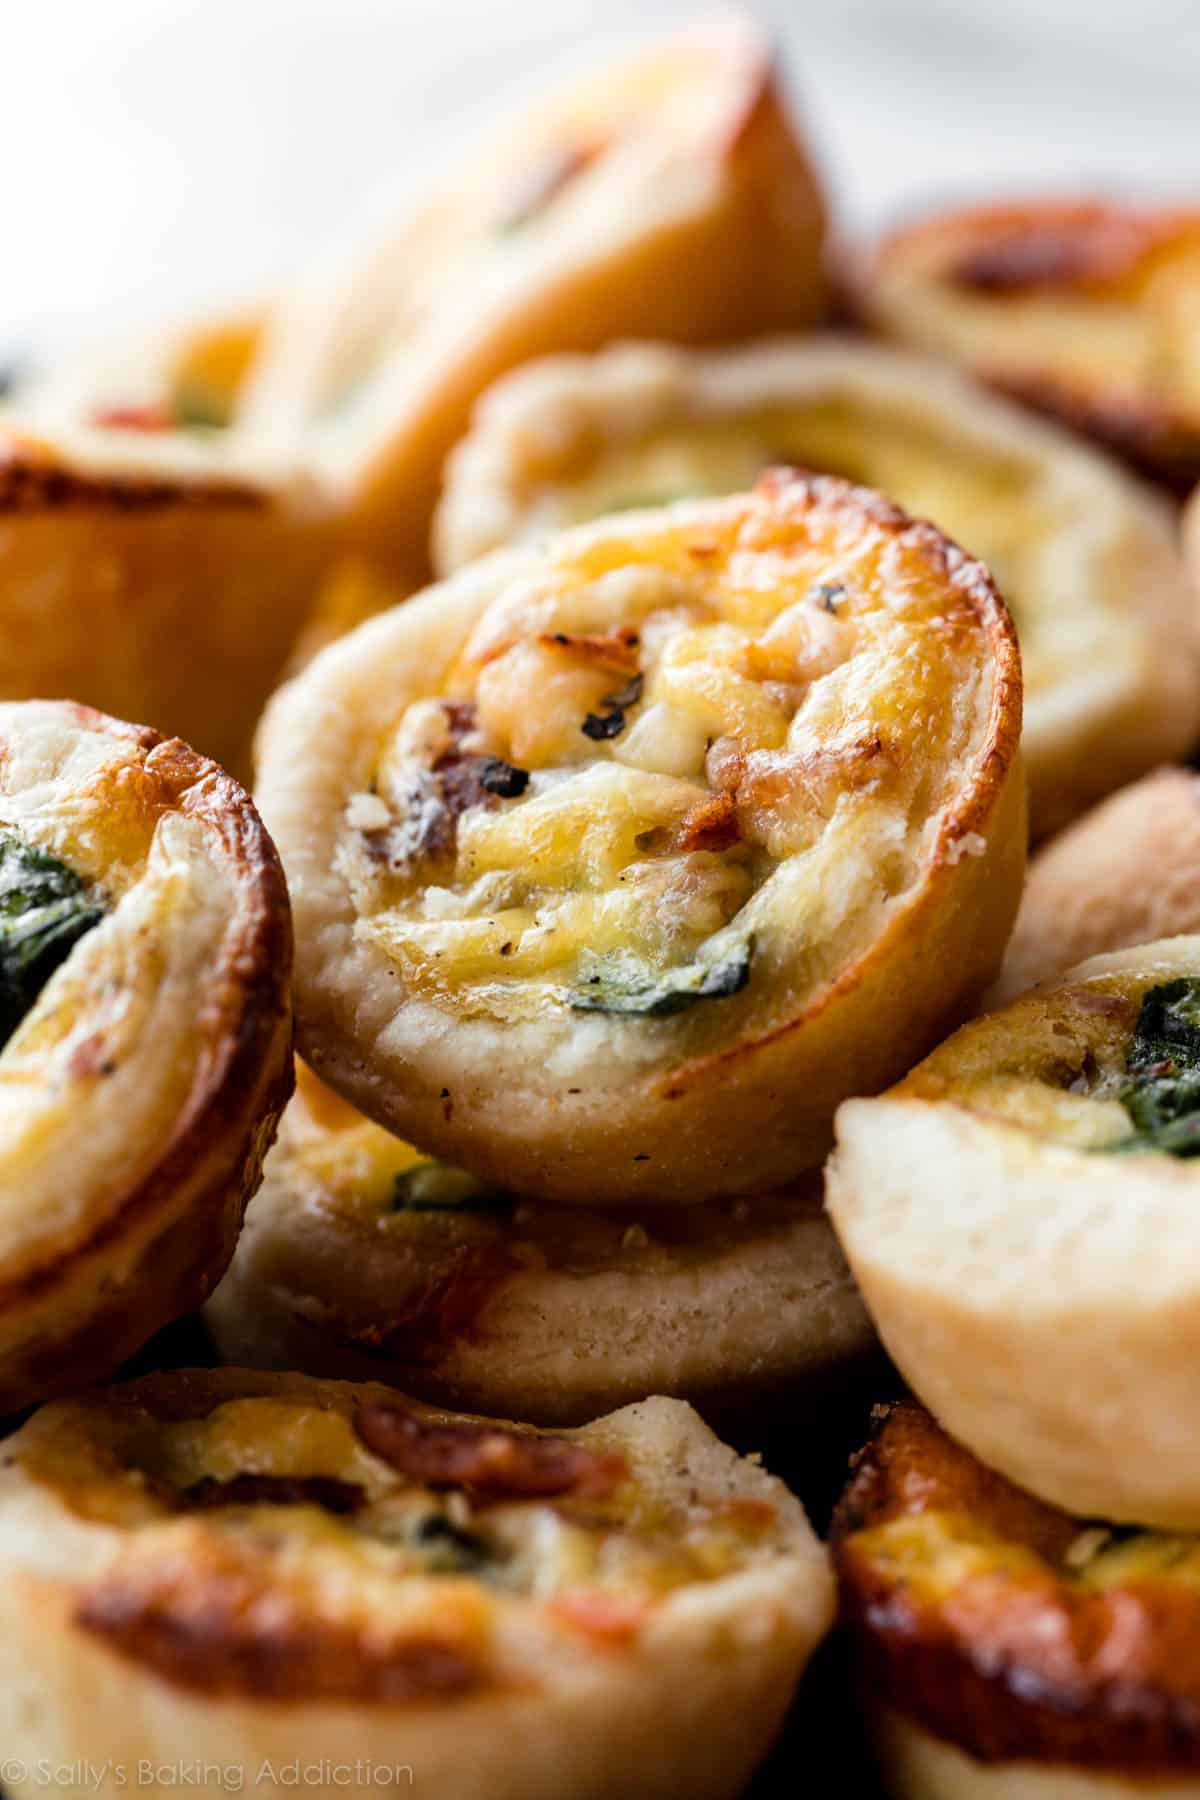
Mini Quiche Video Tutorial
How to Make Mini Quiche
- Make pie dough: Pie dough needs to chill for 2 hours before it’s useable, so I always recommend making it the night before. Or make it now and store it in your freezer for up to 3 months.
- Make the egg filling: I like to make the egg filling before I start shaping the crusts. That way it’s ready and the shaped dough isn’t just sitting there—remember, pie dough loves being cold. Chill the filling in the refrigerator as you work on the dough.
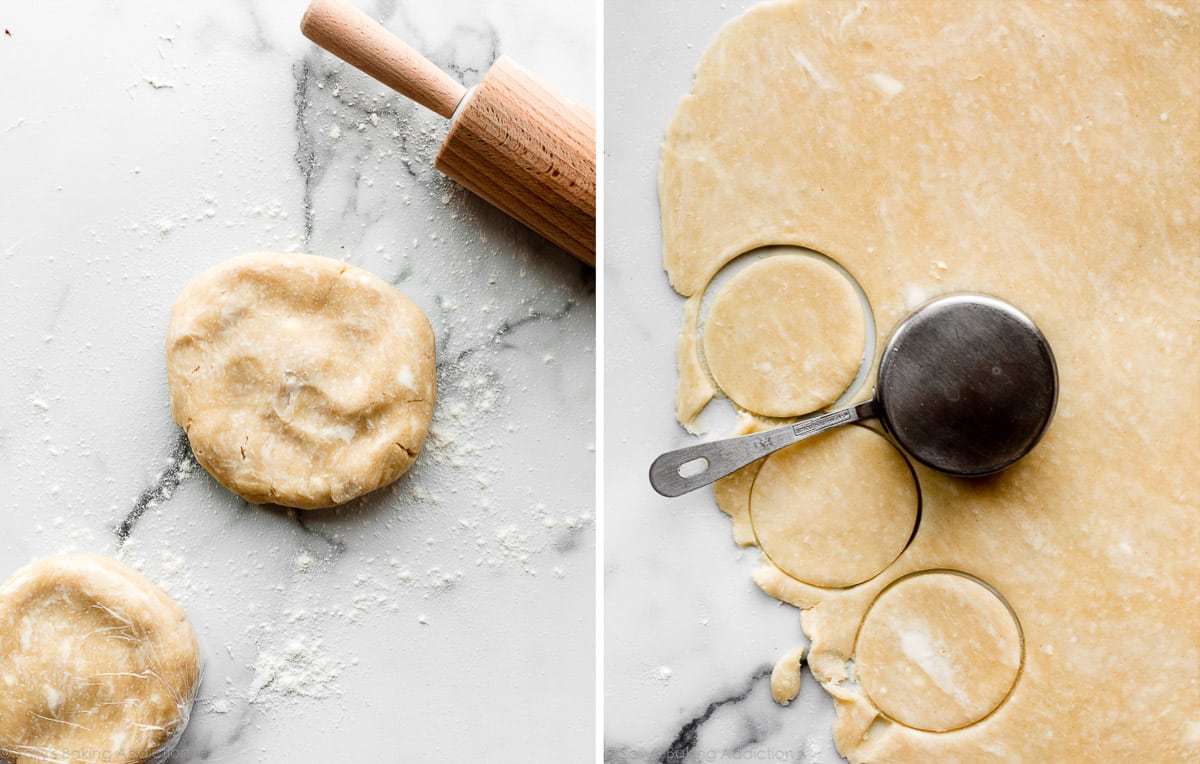
- Roll out pie dough & cut into small circles: Like my mini pecan pies, I recommend a 2.5 inch cookie cutter. If you don’t own a cookie cutter that size, use a measuring cup instead. Sometimes I use my 1/3 cup measuring cup. Re-roll the dough scraps until all the pie dough is used. You’ll have about 24 from each crust (48 total). Work quickly, as the dough becomes delicate the longer it sits at room temperature.
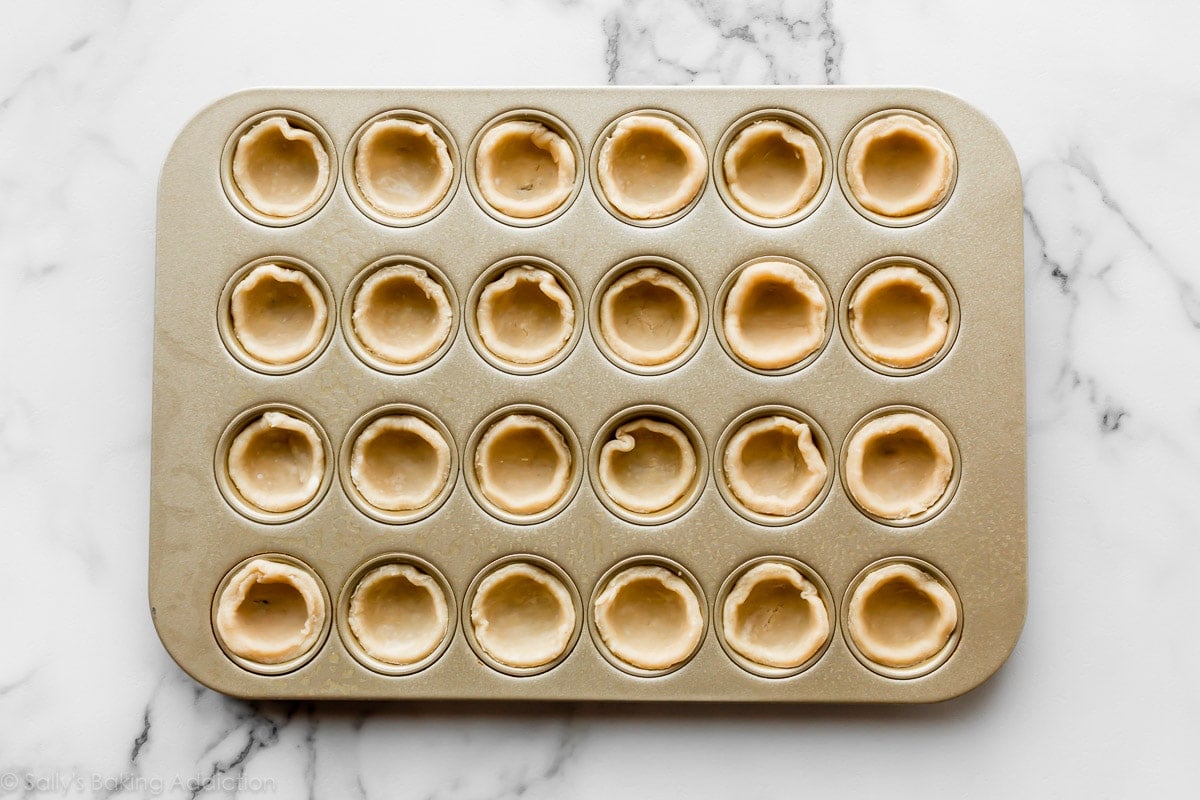
- Fit the dough rounds into your mini muffin pan: Grease a mini muffin pan. Press the dough flat into the bottom of the crevice and up the sides.
- Fill each with the egg filling: Use a mixing bowl or large liquid measuring cup to easily pour the filling into each crust. Fill just about to the top. (Best part: No pre-baking the crusts required!)
- Top with desired add-ins: Top each individually instead of mixing the add-ins into the egg filling. The add-ins sink to the bottom, so you’ll have plenty of mini quiches without any. Additionally, chunky egg filling is difficult to pour into the little cups. Sprinkling each with your add-ins is much easier, all around.
- Bake until the crust is browned: These are so much quicker to bake and cool than a full quiche. You’ll definitely appreciate that!
All of my add-in suggestions below!
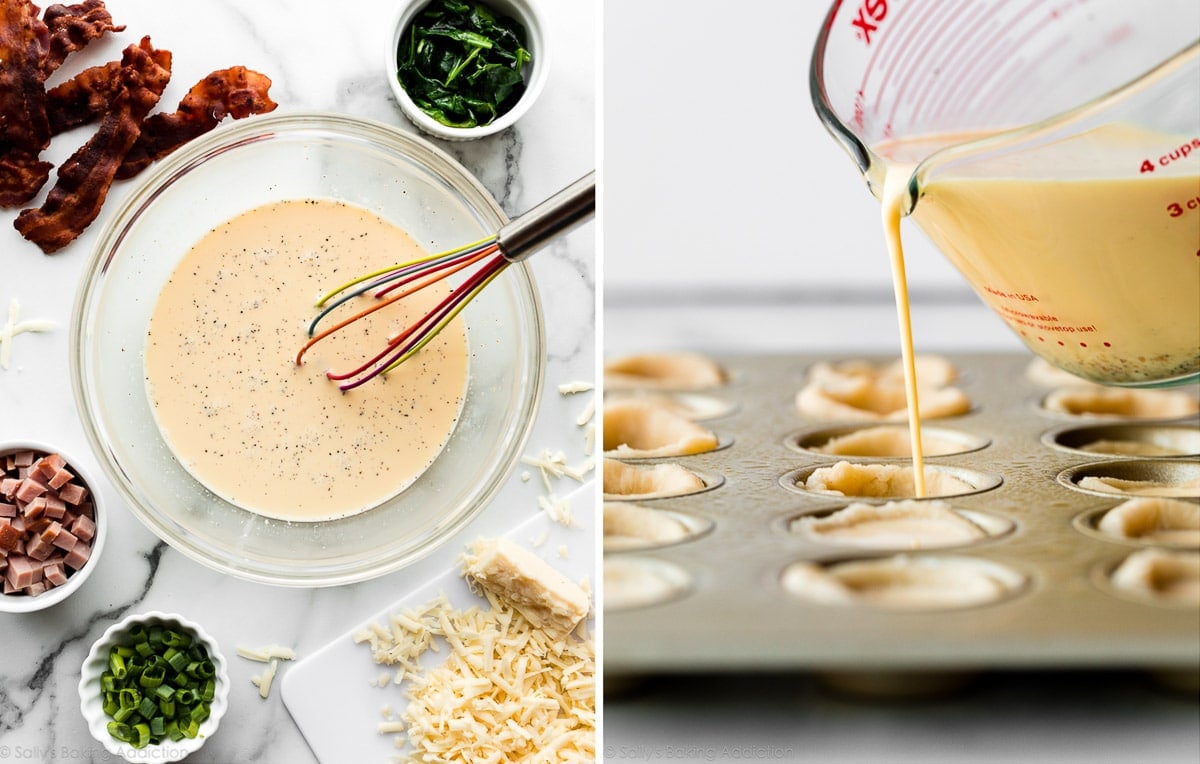
Mini Quiche Recipe Ingredients
A quick overview of the ingredients you need:
- Pie Crust: Don’t skimp on flavor and texture—make homemade pie crust. My favorite pie crust recipe is straightforward and you can make it ahead of time and freeze. You need flour, salt, butter, shortening, and water. Unlike my regular quiche where you only use 1 pie crust (half of the recipe since it yields 2 crusts), you use both crusts here. Very convenient! You could also use my all butter pie crust. If you can’t make your own, store-bought pie crust works in a pinch.
- Heavy Cream and Milk: You can use any milk you have on hand including nondairy milk. The thinner (and lower fat) the milk is, the flimsier the mini quiches taste. For the best tasting mini quiche, however, use a combination of milk and heavy cream—or simply use half-and-half. Using just heavy cream produces an overly thick filling. Using only milk is great, but a combination of heavy cream and milk tastes even better.
- Eggs: Use 4 eggs per 1 cup of milk.
- Salt and Pepper
Can I Skip the Pie Crust?
You can make crustless mini quiches from this recipe. Spray your mini muffin pan or regular size muffin pan with nonstick spray—it works much better than butter here—and pour the filling directly into the pan. The bake time is a little shorter. See my recipe note below.
I also have this Crustless Veggie Quiche, Easy Frittata Recipe, and Breakfast Egg Muffins recipe. These are wonderful naturally gluten free alternatives.
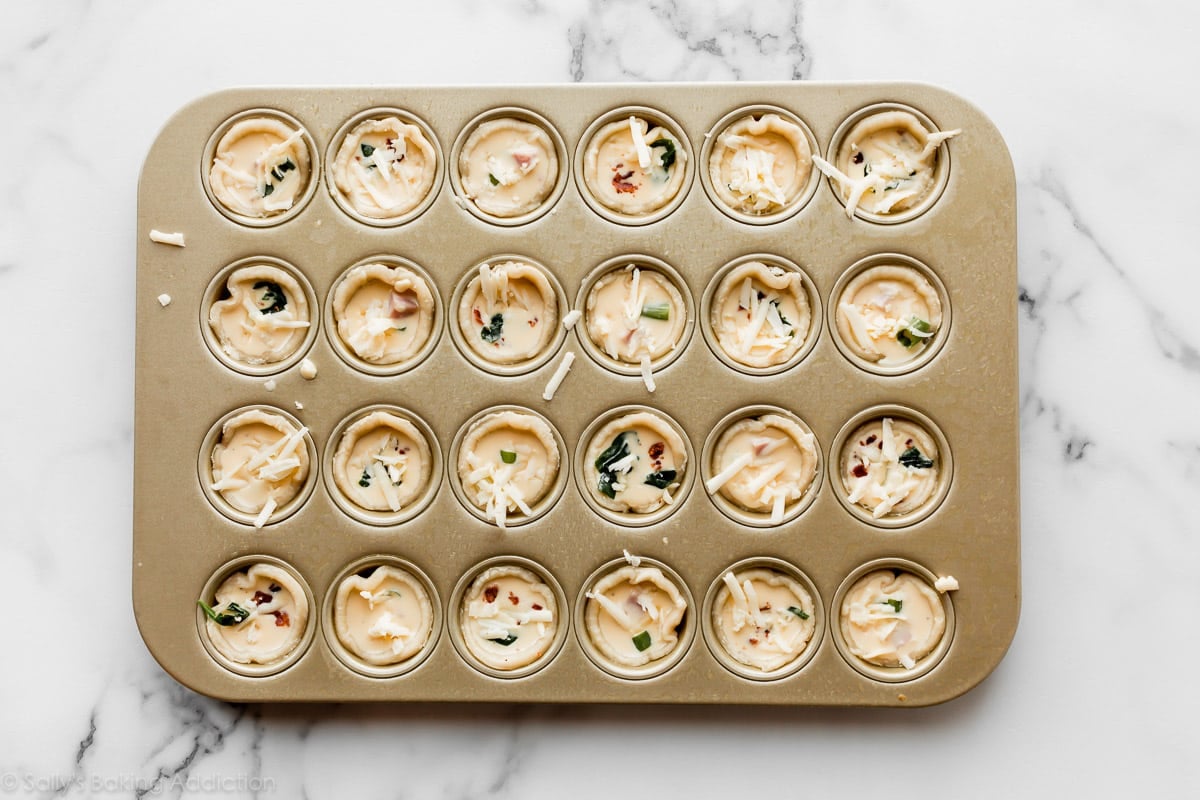
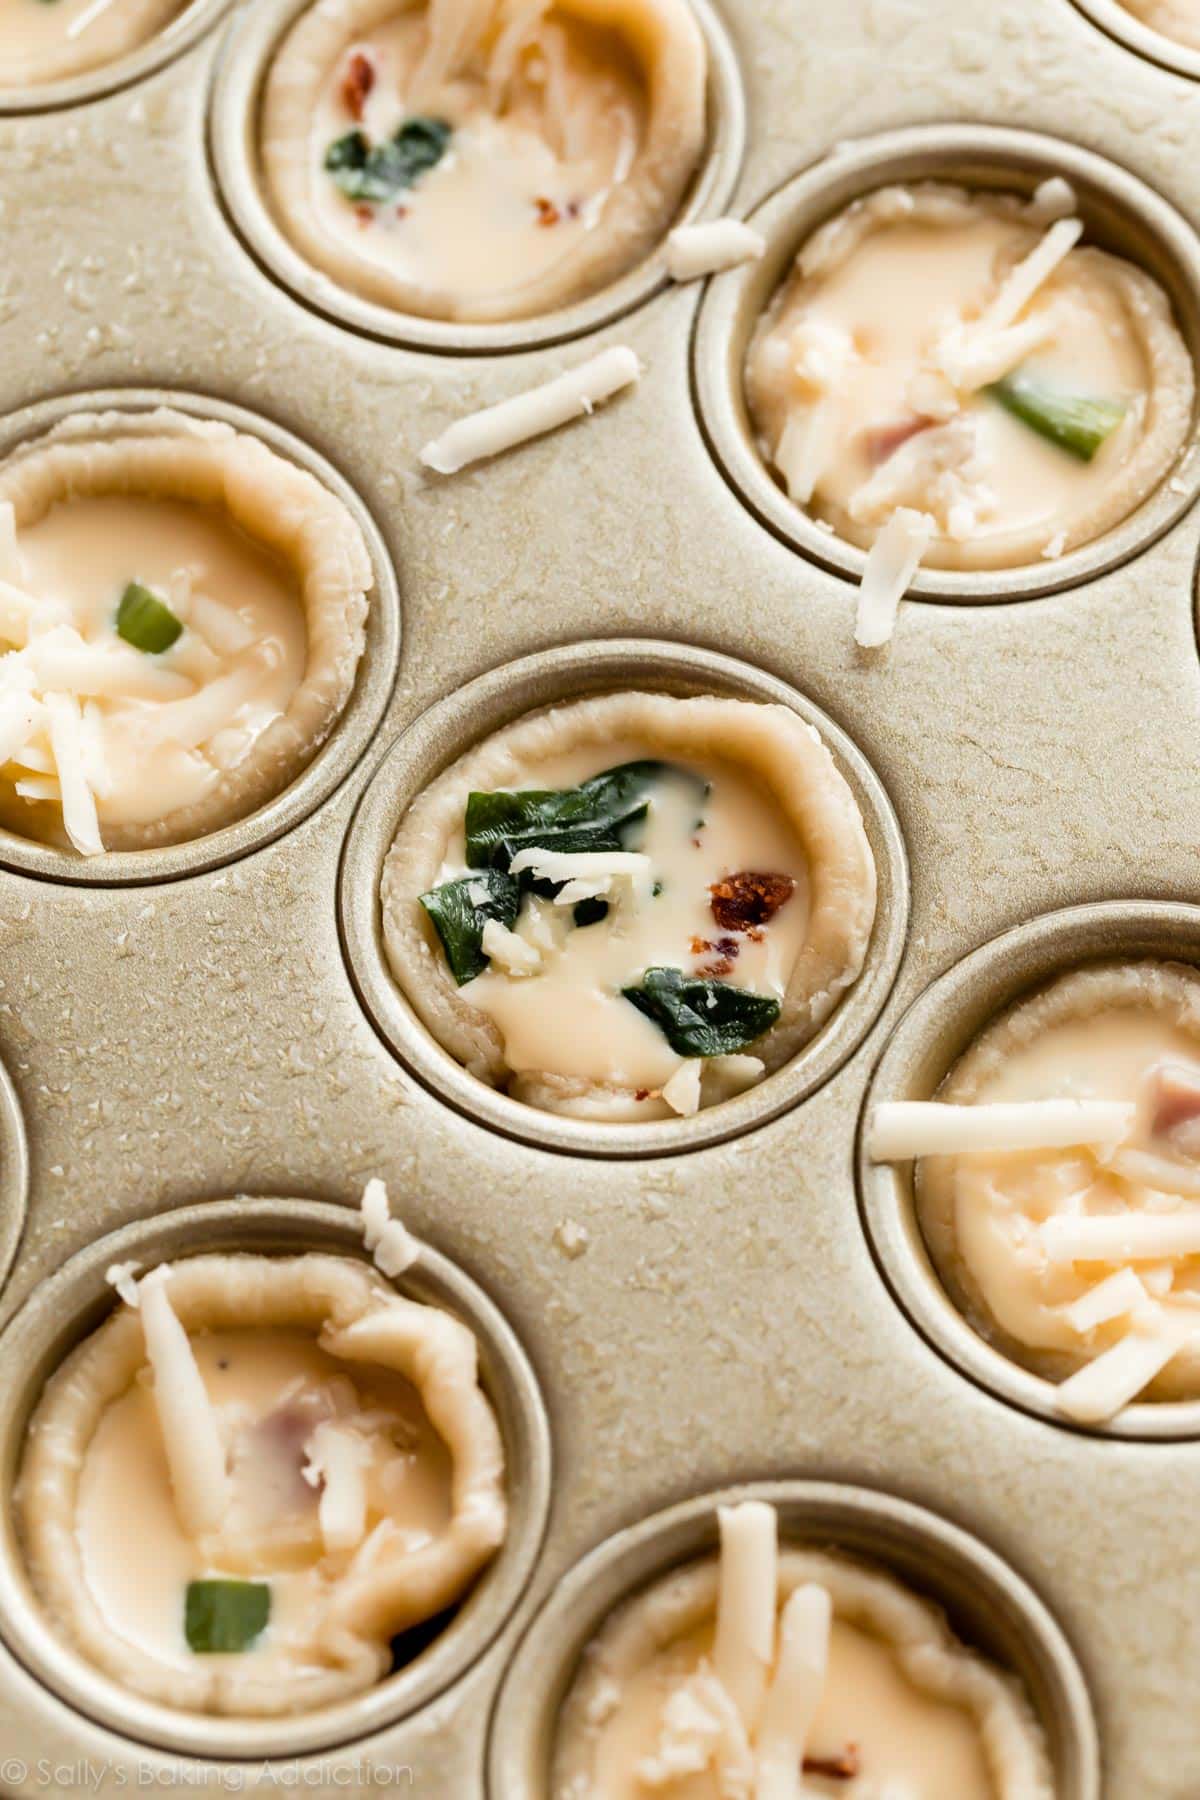
Mini Quiche Flavors & Add-Ins
Now it’s time to bake! Follow the mini quiche baking instructions in the recipe below and right before baking, top with your add-ins. Remember, it’s best to add your add-ins/flavors on top of the mini quiches instead of mixing them right into the egg mixture.
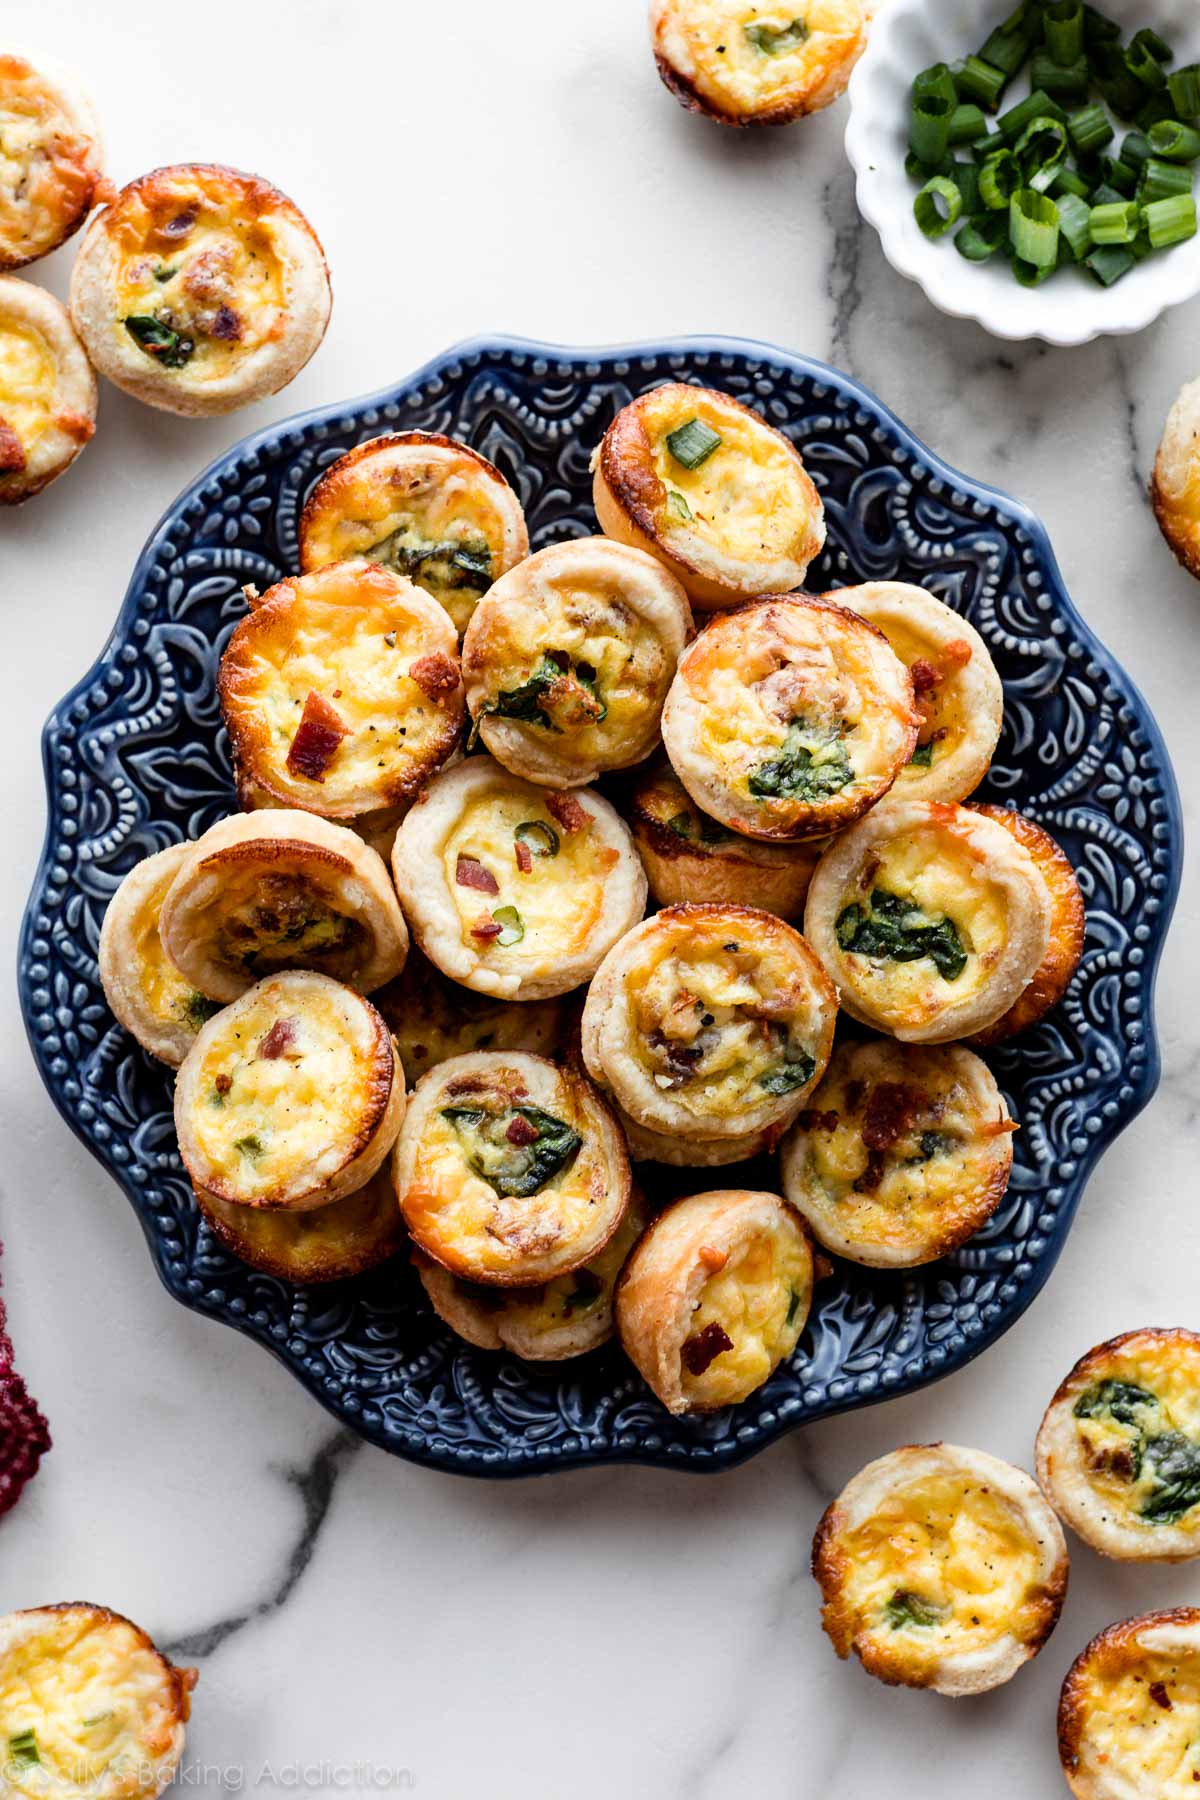
- Ham, Swiss, & Scallion (pictured): 2/3 cup cooked and cubed ham, 2 Tablespoons chopped scallion, 1/2 cup shredded Swiss cheese.
- Ham, Spinach, & White Cheddar (in video): 2/3 cup cooked and cubed ham, 2-3 Tablespoons finely chopped fresh spinach, 1/2 cup white cheddar cheese.
- Bacon, Spinach, & White Cheddar (pictured): 1/2 cup cooked and crumbled bacon (5-6 slices), 1/4 cup sautéed chopped spinach (I sautéed it in a little leftover bacon grease for 2 minutes), 1/2 cup white cheddar cheese.
- Veggie & Feta: 1/4 cup chopped fresh mushrooms, 1/4 cup chopped fresh bell pepper, 1/4 cup diced tomato, 1/2 cup crumbled feta cheese.
I also have these favorite full-size quiche recipes:
- Spinach Cheese Quiche – simple & classic!
- Goat Cheese Spinach Sun-Dried Tomato Quiche
Have fun customizing your own!
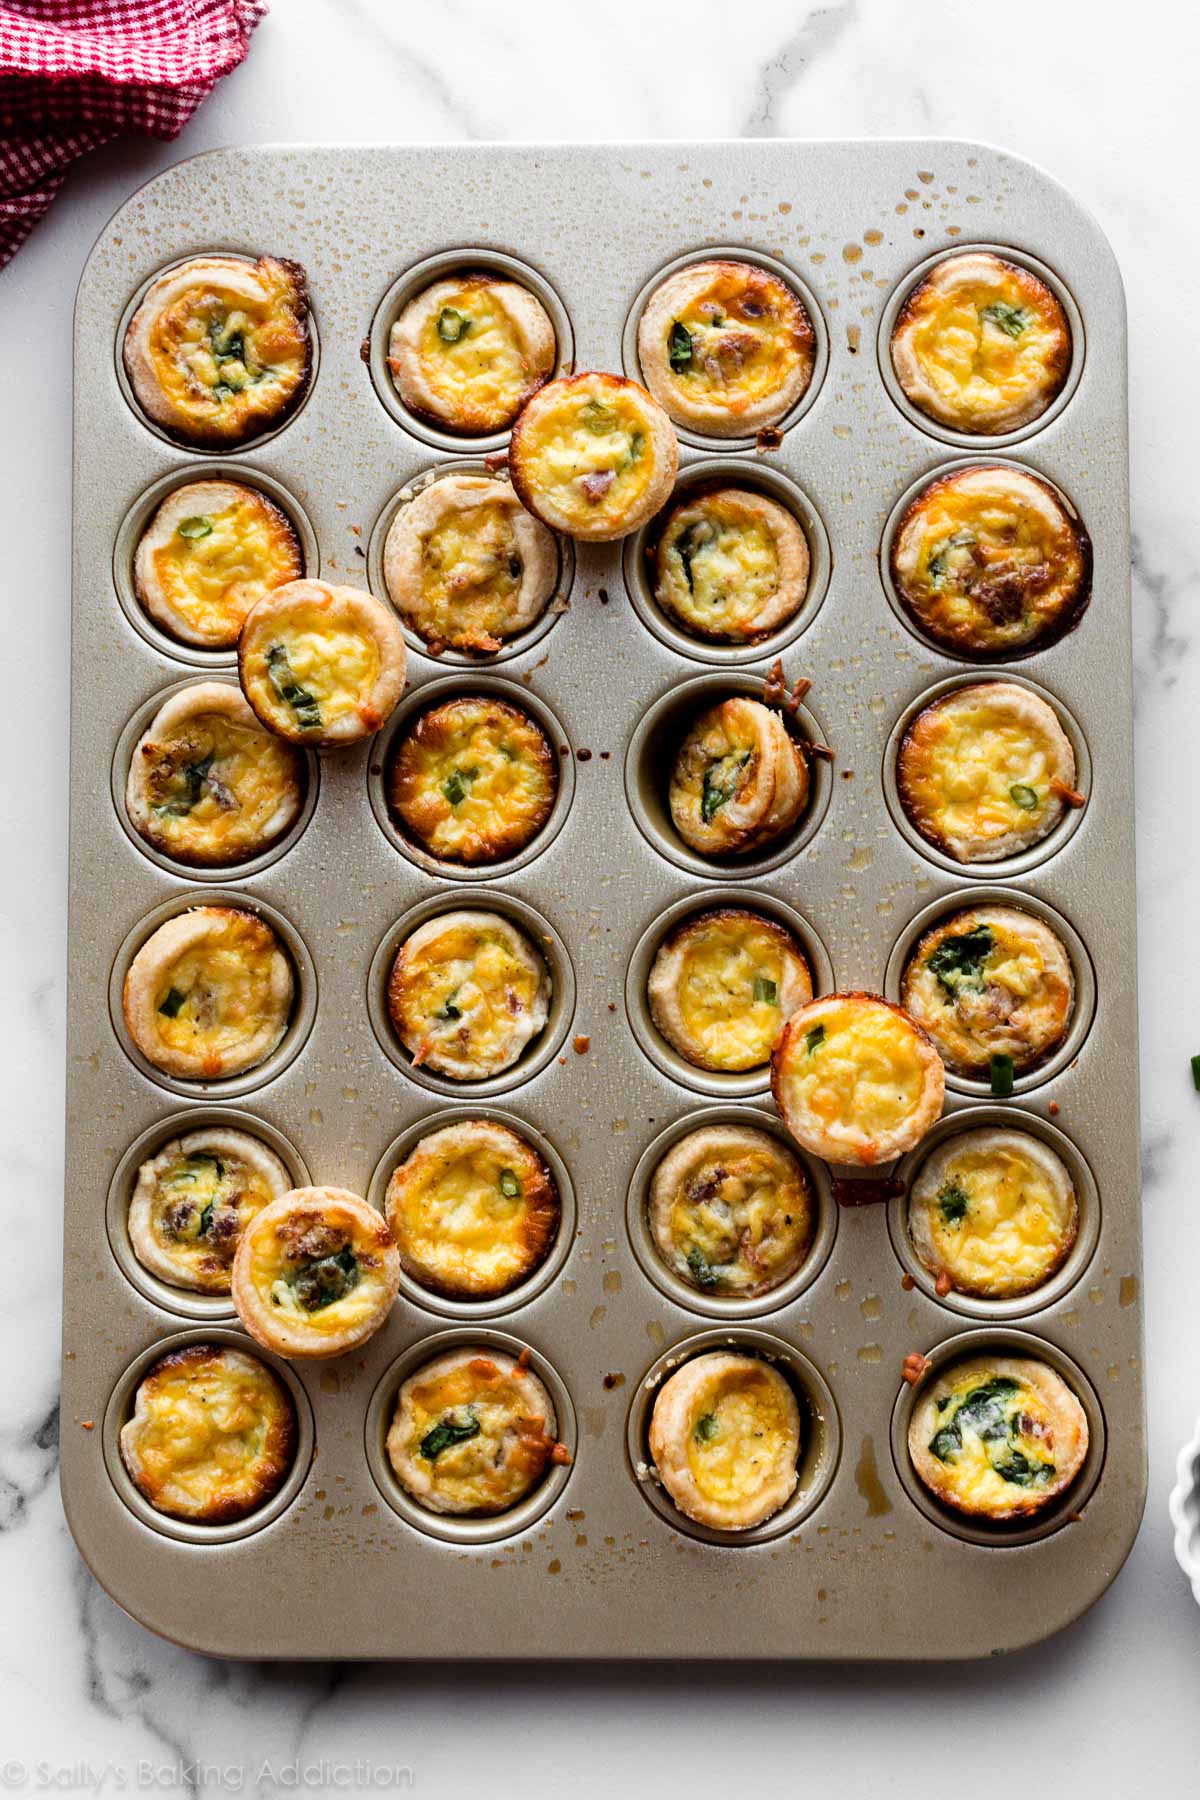
What to Serve with Mini Quiche
- Fruit Salad, Bacon or Sausage
- Strawberry Bacon Salad or any side salad
- Kale Pesto Pasta Salad or Strawberry Feta Pasta Salad
- Coffee Cake
- Cinnamon Rolls
- Blueberry Muffins or Banana Muffins
And if you’re serving mini quiche as part of an Easter spread, see even more Easter brunch recipes for inspiration.
Print
Mini Quiche (Any Flavor!)
- Prep Time: 2 hours, 30 minutes (includes pie dough chilling)
- Cook Time: 25 minutes
- Total Time: 3 hours
- Yield: 48-50 mini quiches
- Category: Breakfast
- Method: Baking
- Cuisine: American
Description
This is a perfect base recipe for mini quiches where you can add your favorite add-ins and flavors. Bake in my super flaky homemade pie crust. Review video tutorial above and read recipe notes below before beginning.
Ingredients
- 2 unbaked Flaky Pie Crust (what I used) or All Butter Pie Crust*
- 4 large eggs
- 1/2 cup whole milk*
- 1/2 cup heavy cream or heavy whipping cream*
- 1/4 teaspoon each salt and pepper
- 3/4 cup add-ins (see recipe note)
- 1/2 cup shredded or crumbled cheese (see recipe note)
Instructions
- Pie crust: I like to make sure my pie dough is prepared before I begin mini quiche. Make pie dough the night before because it needs to chill in the refrigerator for at least 2 hours before using.
- Prep the egg filling: In a large bowl with a handheld or stand mixer fitted with a whisk attachment—or simply using a whisk and mixing bowl—beat/whisk the eggs, whole milk, heavy cream, salt, and pepper together (on high speed if using a mixer) until completely combined, about 1 minute. Cover and refrigerate egg filling until step 6.
- Preheat oven to 375°F (191°C). Grease two 24-count mini muffin pans. (Nonstick spray is best.) If you only have 1 mini muffin pan, bake these in batches. Roll out first pie dough, fill, and bake then roll out the 2nd pie dough, fill, and bake.
- Shape the mini crusts: Working with 1 chilled pie dough at a time, place the dough onto a floured work surface. Roll into a large 12-inch circle. Use your warm hands to mold any cracking edges back together as you see me doing in the video tutorial above. From the circle, cut rounds using a 2.5 inch cookie cutter. (Sometimes I use my 1/3 cup measuring cup, which is 2.5 inches in diameter.) You’ll have to re-roll the dough scraps a few times. Work quickly, as the dough becomes much more delicate the longer it’s at room temperature. You’ll get about 24 rounds per pie crust. Repeat with 2nd chilled pie dough for a total of about 48.
- Place the dough rounds into greased 24-count mini muffin pan(s). Press the dough flat into the bottom of the crevice and up the sides.
- Evenly pour cold egg filling into each unbaked crust. Top evenly with add-ins, then sprinkle each with cheese.
- Bake mini quiches until the center is just about set and edges are lightly browned, about 25-28 minutes. Allow to cool for 5 minutes before removing from the pan. If greased well, the mini quiches pop right out using a spoon to scoop them up. Serve warm or at room temperature
- Mini quiches make great leftovers! Cover tightly and store in the refrigerator for up to 4 days.
Notes
- Make Ahead & Freezing Instructions: The pie dough can be prepared ahead of time and stored in the refrigerator for up to 5 days or in the freezer for up to 3 months. To freeze, cool baked mini quiches completely, then layer between sheets of parchment paper in a large freezer-friendly container. Freeze for up to 3 months. Thaw in the refrigerator or on the counter, then bake at 300°F (149°C) for 15 minutes or until warmed.
- Special Tools (affiliate links): Electric Mixer (Handheld or Stand) or Glass Mixing Bowl & Whisk | 24-count Mini Muffin Pan | 2.5-inch Cookie Cutter
- If using a 12-count standard muffin pan: Cut the pie dough into 3.5 inch circles. Other assembly instructions are the same. Bake for about 27-30 minutes until the centers are set and edges are lightly browned. Yields about 16.
- Pie Crust & Crustless Option: Both linked pie crust recipes make 2 crusts. You need 2 crusts for this recipe. You can use store-bought pie crust if desired. Make sure it is thawed. For crustless quiches, spray your mini muffin pan or regular size muffin pan with nonstick spray and pour the filling directly into the greased pan. Top with add-ins, then cheese. Bake mini quiches for 16-19 minutes and regular size (in a 12-count pan) for 20-23 minutes.
- Whole Milk & Heavy Cream: Use this combination for best taste. If desired, use 1 cup of half-and-half instead. In a pinch, using all milk (whole milk, lower fat milk, or unflavored nondairy milk) works just fine.
- Add-Ins: You need about 3/4 cup add-ins including vegetables and meat/seafood. Most quiche add-ins should be pre-cooked and can still be warm when adding on top of each quiche. See blog post for my favorite add-ins. No need to pre-cook or sauté add-ins like mushrooms or bell peppers unless you want to.
- Cheese: Some favorites include feta cheese, goat cheese, white cheddar cheese, Swiss cheese, and gruyere.


These look great — just the recipe I needed for making an appetizer to bring to dinner tonight! A question before I crank up the music and destroy my kitchen, though… Why wait to add the “extras” to the egg batter until AFTER pouring the mixture? If the extras are going to sink anyhow, wouldn’t it be easier to portion them and less messy to place them BEFORE filling the cups with the liquid? Thanks!
Hi Mark, you could do it either way. When I say the add-ins sink, I mean they sink in the bowl of the egg mixture and when you go to pour it into the crusts, the first several won’t have any add-ins because they are all at the bottom of the bowl.
Hi Sally! How long would you blind bake regular muffin size crust when making the quiches larger?
Hi Liz, see recipe Notes for regular muffin-sized quiche baking instructions. No need to blind bake the crust. Hope you enjoy these!
Hello. I have a recipe for a homemade single-crust flaky pie dough that’s made with 1/2 cup butter. Would it work for this recipe?
Absolutely, but you’ll want 2 of them. You need 2 pie doughs for this amount of filling, or you can halve the filling for 1 pie crust.
I tried this for the first time this morning. It is fabulous. I had a little of the egg mix left so I put that in a skillet and it was delicious also. Next breakfast event at work I will definitely be making this recipe!
The crust! The crust!! So good and so easy. I seriously had a batch of these fully made—including chilling the crust—in under an hour (i worked like lightning, cut the rounds and shaped the mini crusts, THEN chilled in the metal mini muffin pan. Much quicker and less fiddly). I made a filling with 1/2 finely diced yellow onion, 1 finely diced medium Roma tomato, and herbes de Provence, sautéed in olive oil and about 1/4 cup white wine until the veggies were soft and the wine and liquid totally evaporated; then I slowly tempered the egg mix by stirring in the hot filling a few tbsp at a time; added about 1/4 cup finely diced ham and about 1/4 cup goat cheese crumbles. Result was absolutely stunning.
this is the same recipe i used when i used to bake for a café! pro tip for people with arthritis: you can save a lot of hassle and pain by using a coarse, standard shred cheese grater to piece the butter for your pastry, just make sure your hands and the butter are cold cold cold, and flick some flour over the pile of grated butter every few passes so it doesn’t reintegrate under its own weight.
also i add a little pinch of fresh grated nutmeg to the egg and cream mixture, a habit i learned from an austrian chef (cream pasta dishes also benefit from this, as it subtly enhances the umami flavours without any identifiable nutmeg taste)
Can you use premade pie crust ?
Absolutely.
Followed the recipe plus notes for standard-size muffin tin, and these turned out great! I did half the batch with spinach, garlic powder, and feta, and the other half with veggie sausage, red pepper flakes, and cheddar. Both were a hit with friends and coffee!
Perfect!
I’ve made your buttery flakey piecrust before, so I used it again for this. Gorgeous, light, flakey piecrust for the win!
I made half the custard to make 10 liitle quiches in a standard muffin tin, filling them with sauteed leeks (cooled in the fridge) and gruyere. Sadly, I didn’t realize I had no bacon before I started, but they were still delicious thanks to the most excellent little crusts.
I made mini quiche years ago and loved them. Now grandson needs something wholesome and quick for breakfast before school. He’s 6 and coming over tonight to make these with me and then take home and freeze. THANK YOU for all the background and tips. I had forgotten so much. Can hardly wait for 1st pan to come out to see if he falls in love with them like I did!
How sweet! We hope you and your grandson enjoy these mini quiches. Happy baking 🙂
Just made these for post Easter service breakfast at church. Used shallots, shiitake mushrooms. Smoked sausage & cheddar. I’m having a hard time not eating them after trying one. I’ll need to exercise some serious self-discipline.
Do I need to make any alterations for high altitude? I’m only at 5,000 feet, but it seems to make a difference for some recipes. Also, has anyone tried making these with flax “eggs”?
thanks!
Hi Amy, I wish we could help, but have no experience baking at high altitude. Some readers have found this chart helpful: https://www.kingarthurflour.com/learn/high-altitude-baking.html We don’t recommend using flax eggs as an egg substitute in this mini quiche recipe.
Has anyone tried coconut milk instead of dairy?
Thanks
I am going to try this recipe with egg substitute. Wish me luck!
Thank you so much for this recipe. I have been making a variety of full sized quiche for years, but I have never tried the minis. You’re so right, this version looks much easier and quicker than the regular size. Mini quiche are way too expensive to buy when you need lots for a crowd. I love all of your recipes, and I’m sure these will turn out just as great. I can’t wait to make these for our family Christmas brunch!
Hi Sally.
Don’t the pie crusts need to be blind baked before adding the filling?
Hi Lois, we don’t blind bake with this recipe, but you certainly can if you’d like. Enjoy!
I was going to try this but instead of pie crust I used canned biscuits. Baked it for 20 minutes on the bottom rack then 10 minutes on the middle rack to brown it. They were gone before they even cooled. 1 pan of Lorraine and one Florentine.
This was unbelievably delicious!!
I live by myself so am baking a batch of mini quiche using taco boats as the crust, will freeze the extras and have a quick meal on hand when needed.
Great recipe! My son loves them. We made them for breakfast before school. Have you tried reheating from frozen? I plan to use my air fryer. Thanks! We have made several things from your site and have always been happy with them.
Hi Megan! We haven’t tried reheating these from frozen, but let us know how it goes in your air fryer!
I made these with standard muffin pan as I don’t have the smaller one, but unfortunately quite a bit of the dough was still undercooked/uncooked! I baked them for 30 minutes, and didn’t want to leave them any longer as the edges on top were getting about as browned as I was comfortable with. Some had about 1/3 thickness of dough uncooked, some even a little more than 1/2 of the thickness.
This was my first time making quiche, or even using pie crust really. Any idea what could have been the issue? I thought maybe I had the dough rolled out too thick, but I did roll it out to 12 in. like stated, I cut out circles of the size like the recipe says, and actually had a slightly higher yield than stated in the recipe notes (ended up with about 17-18 quiches).
Despite the fact the dough was not cooked through, I still thought they were absolutely delicious! I just want to really perfect this. I’d be grateful for any tips, tricks, notes or hacks! 🙂
Hi Jade, Thank you for trying this recipe and we are so glad you enjoyed the flavor! We usually get around 16 if we use a standard size muffin pan so it sounds like you rolled the dough thin enough. You can always try rolling it a bit thiner if you wish. Next time try lowering the oven rack to a lower position and if you need to extend the bake time you can tent the top with aluminum foil to stop the tops from getting too brown. I hope this helps!
I am making the muffin quiche for wedding shower. I will be making them the day before can i put them in a sterno pan to keep warm during the shower. Do i reheat first or just heat in te sterno pan? I have to make 80
Hi Debbie, that should work — and we imagine you should be able to heat them sufficiently from the sterno pan, but use your best judgement. Hope they’re a hit for the shower!
Just made a batch of these with ham and cheddar. First attempt at making a pie crust and it was so easy! Thanks for the recipe!
used all butter crust, so good! everyone enjoyed! thank you!
Would it be ok to make the filling the night before and refrigerate it?
Sure can! At the end of step 2 cover and refrigerate egg filling until you are ready to use it.
Took me an hour to finally find the actual recipe. No many unnecessary words for the click bait. The recipe is fine, a friend made it, but I am so annoyed by all the blah blah blah that I feel compelled to make a comment.
Hi Martina, I present my free recipes in a way that beginners can learn and understand the process before starting. If you don’t care for it and are annoyed, feel free to find your recipes elsewhere. You can also take advantage of the Jump to Recipe button.
Can’t wait to try this and thanks for all of the info. I know that it is a lot but it is so helpful. Love the tips and suggestions. Keep doing what you’re doing!
I love the way you present your recipes and thoroughly explain the process. Baking is a science…and the little details are so important….because oh my it’s so easy to screw up while baking…so the lengthy tips you provide are priceless! Thank you so much.
Hi Sally, every recipe I’ve made from your post have been wonderful!! I love the way you provide such simple and detailed instructions. Even though I don’t always each step they are great when baking with my kiddos Thanks again!
The blah blah is the fun part – lol. When I’m in a hurry I press jump to recipe. Just wanted to let you know that I appreciate the extra info regarding a recipe! And it annoys me to read negative feedback that is 100% unproductive.
Great easy recipe done it numerous times SO thank you Sally once again. For great instructions. I am . Trying the store bought 12 pie shell crusts to see how they turn out and I used honey goat cheese tomatoes and red peppers diced up.
K:
Sally’s way of writing has been a blessing for so many of us. I learned baking from her website. Been following her for past 11 years precisely for the reason that she gives details, science and reasons behind every step. If you do not want to read all that, just scroll down to the bottom where the printable receipe card is. In my past 11 years of following this website, yours is the first comment ( first rude comment at that! ) that I have seen.
I also have appreciated the explanations …it was on your blog I finally learned the difference between baking soda and baking powder! Thanks for sharing your
Knowledge with amateur bakers like me that do want to learn!!
Seriously – get a life and learn some manners!
How much add ins do you put in each mini quiche. Please advise.
Hi Lesley, 3/4 cup total. See recipe notes for add-in details. Enjoy!
I appreciate Sally’s step-by-step instructions and illustrations. They are so helpful when making a recipe for the first time. I also appreciate the ‘jump to recipe’ button at the very top of the page for those recipes I am more familiar with. Thank you, Sally. Your site is my “go-to” for awesomeness!!
This recipe was delicious!!!
Personally, I find that Sally’s tips/explanations before the actual ingredients and recipe to be very helpful and interesting. Even if I’m not interested, I don’t mind taking the extra few seconds to scroll past it.
Martina, that is a lot of words yourself just to be rude. If you don’t need the narrative, there’s a handy little button to jump to the recipe on most sites. You figured out how to make an unnecessary comment, so perhaps figuring that bit out would be more productive.
This recipe was perfect—especially when we have some vegetarian guests or kids whose tastes run less adventurous so a variety helps!
My daughters have just moved out and cooking on their own. I sent both slink to your site. The details are perfect for beginners and us old cooks alike! Thank you. FYI this is an awesome recipe, we use at every family get together. I do strongly suggest reheating in oven, huge difference.
When looking for a mini quiche recipe, I was excited when I saw you had one! I LOVE all of your recipes and know I won’t be disappointed!
Question about making ahead and reheating: Will the crust become soggy, if so any recommendations on how to prevent that?
Hi Amie! To prevent soggy crusts when making these mini quiches ahead of time, reheat them at 300°F (149°C) for 15 minutes or until warmed. Hope you love them!
used ham not bacon. Very good. Thanks.
Hi … going to try this recipe on Easter for Brunch .. I would like to make ahead , preferably Saturday and just reheat, is this ok to do, and if so how do you recommend re-heating them?
Hi Lilly, you can pop them in the microwave or reheat in the oven. Hope they’re a hit for your Easter brunch!
I made this using regular sized muffin tins and baked for 30 minutes which was perfect! I used goat cheese…super delicious! I could have used only 3 eggs a little less milk for this one though, I had abou 3/4c. leftovers of that. I also used your flaky pie crust recipe….YUMMMM! Thanks for being awesome!
I’m about to give this a try, I made the dough at 5 AM and it is now 7. Thanks for getting me excited to feed my family something new.