These extra soft and chewy M&M cookie bars are so easy to make—no mixer, no dough chilling, no individual dough rolling required! You can use a mix of regular and mini M&Ms and chocolate chips for texture variety, and change out the colors to make them festive for a holiday.
Finally a cookie recipe without chilling!
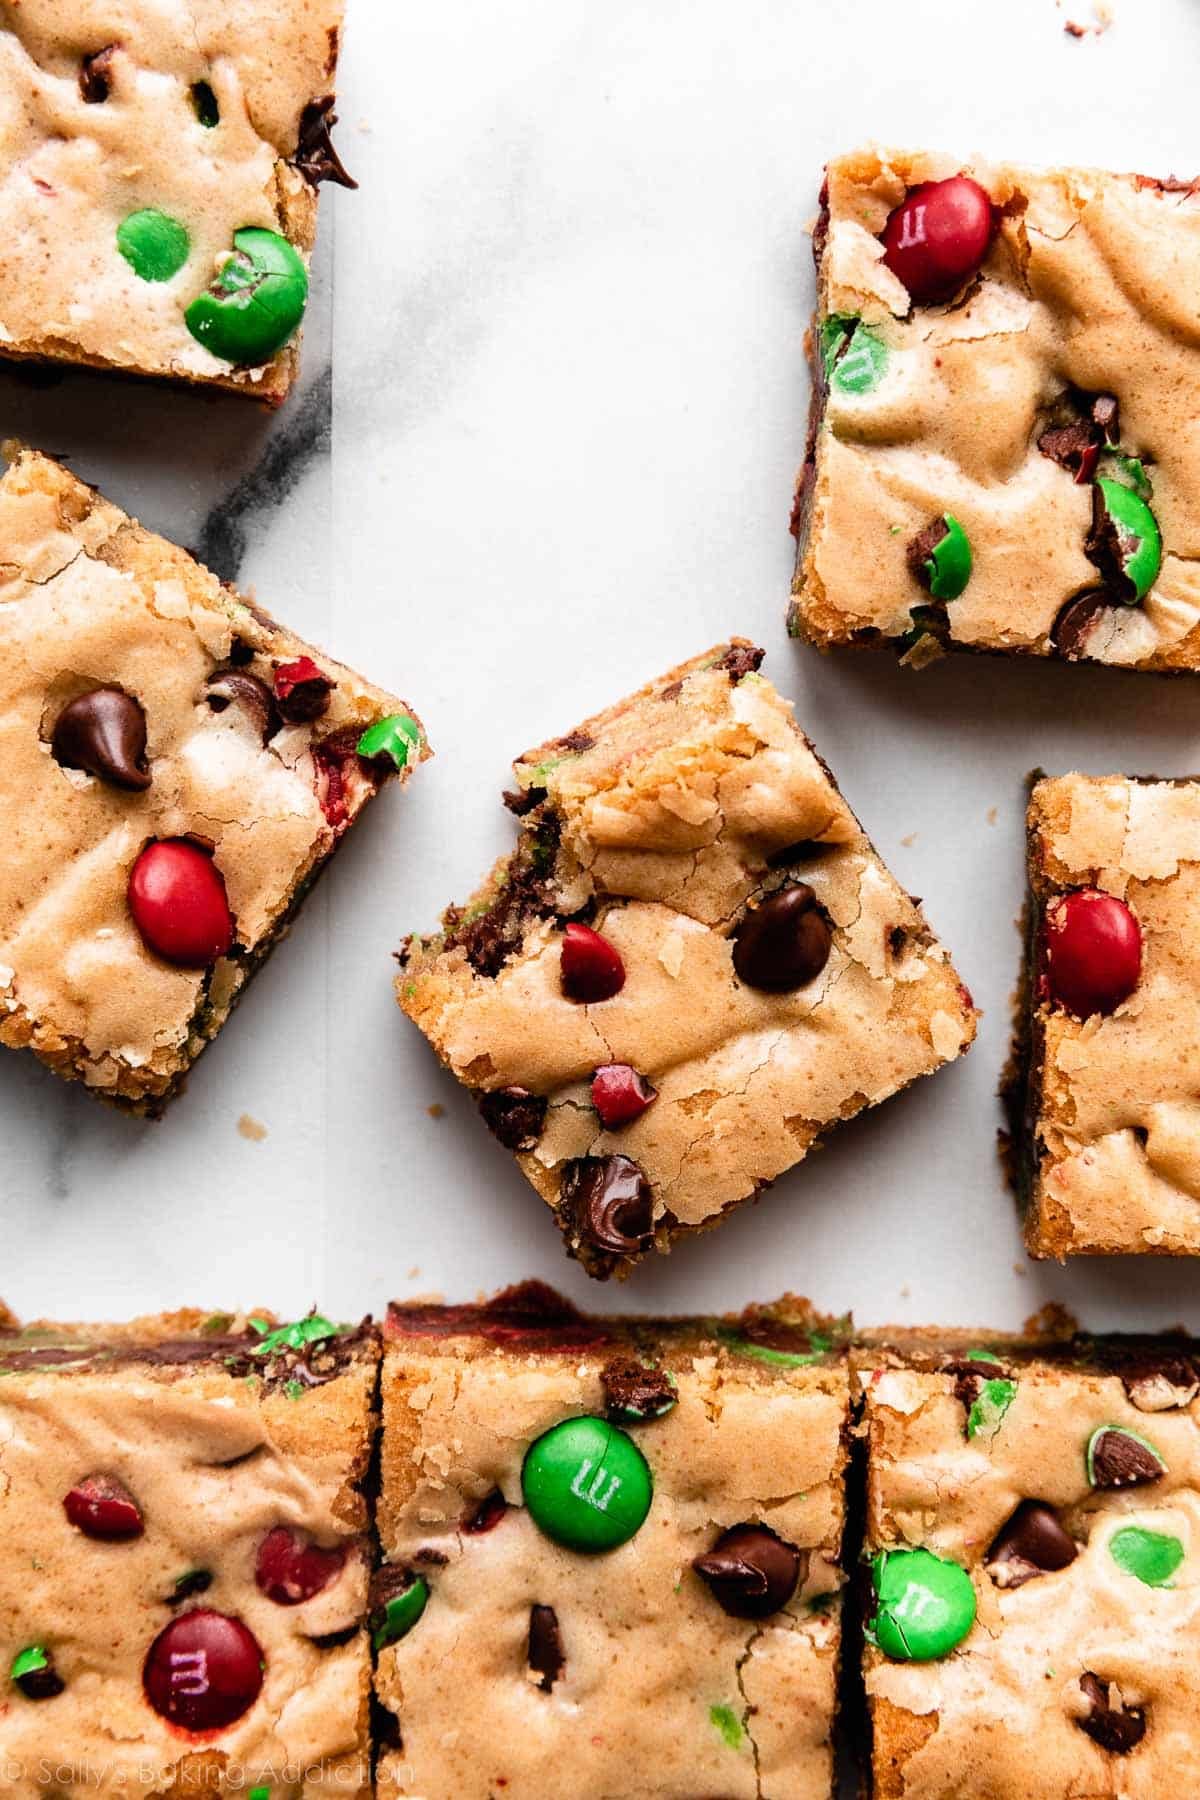
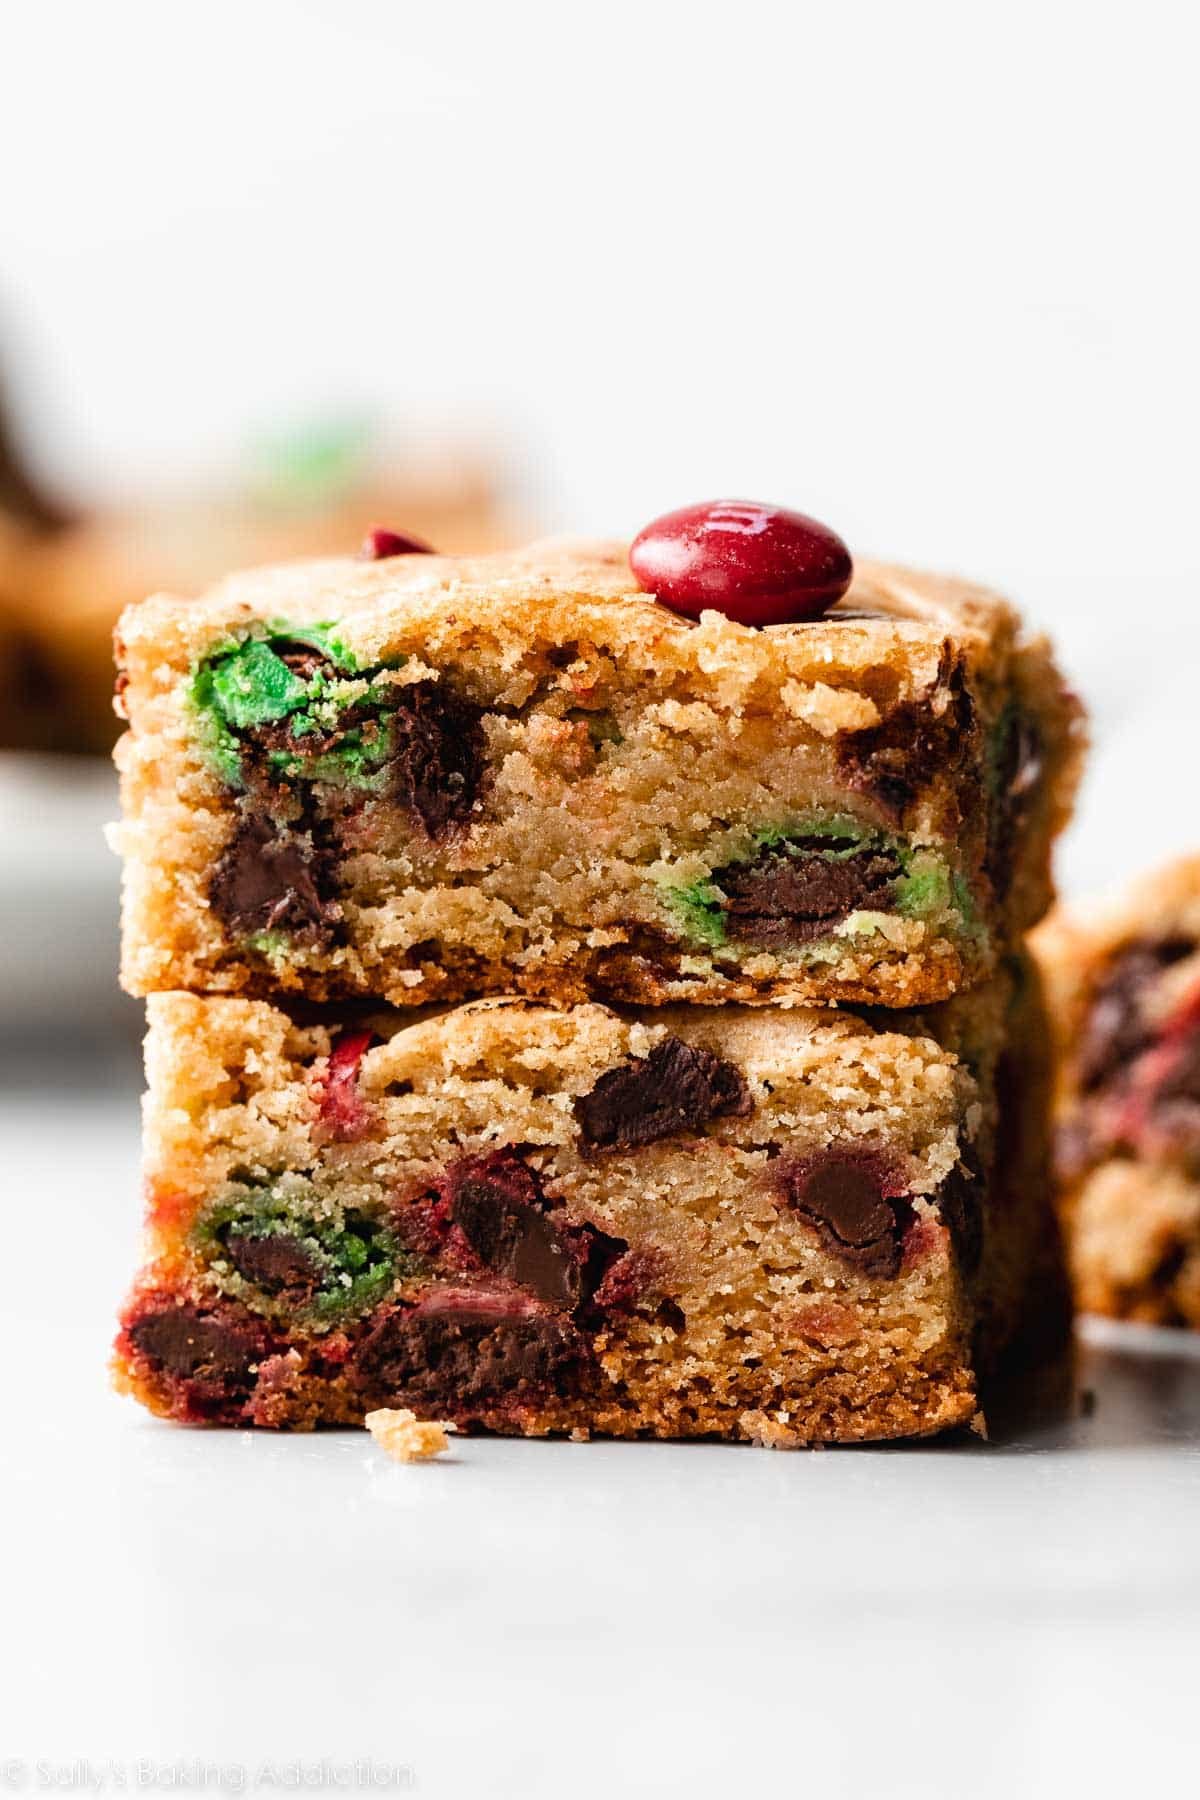
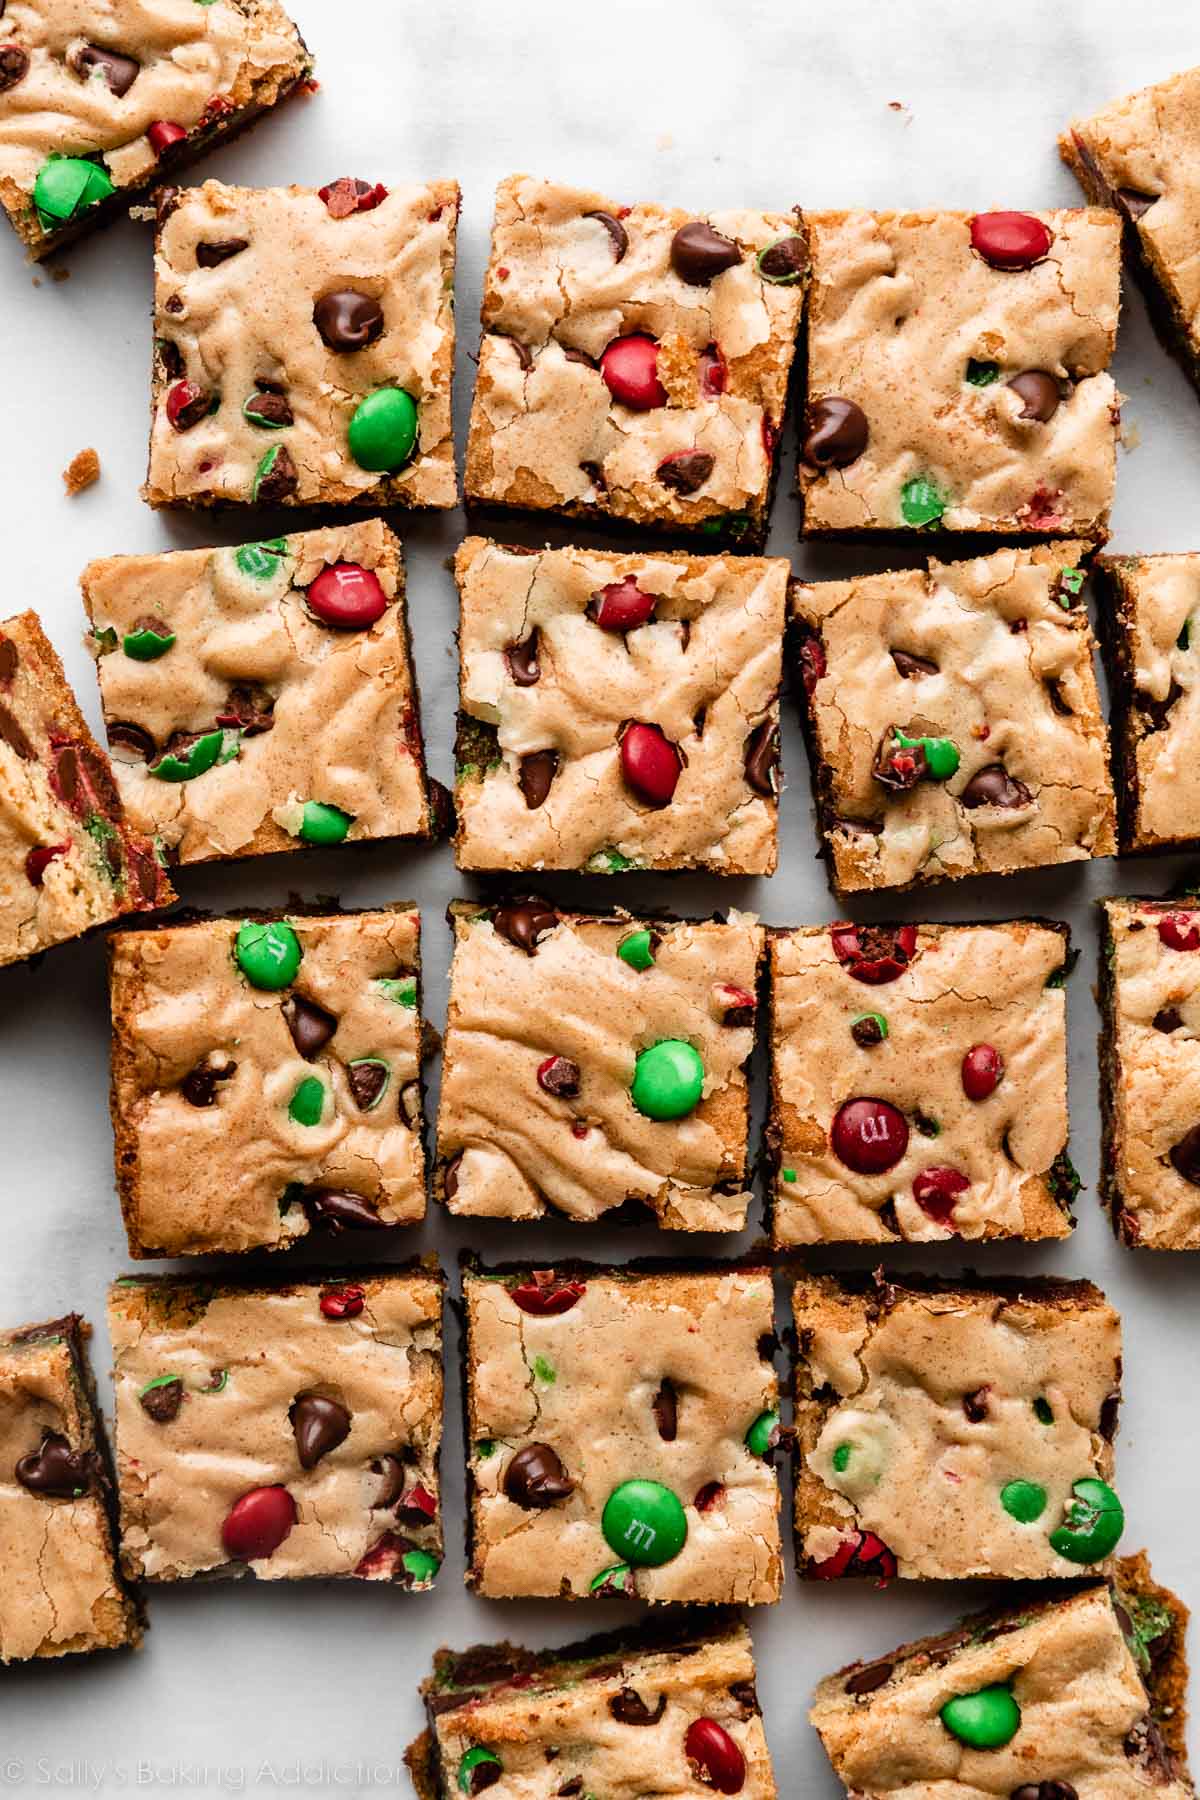
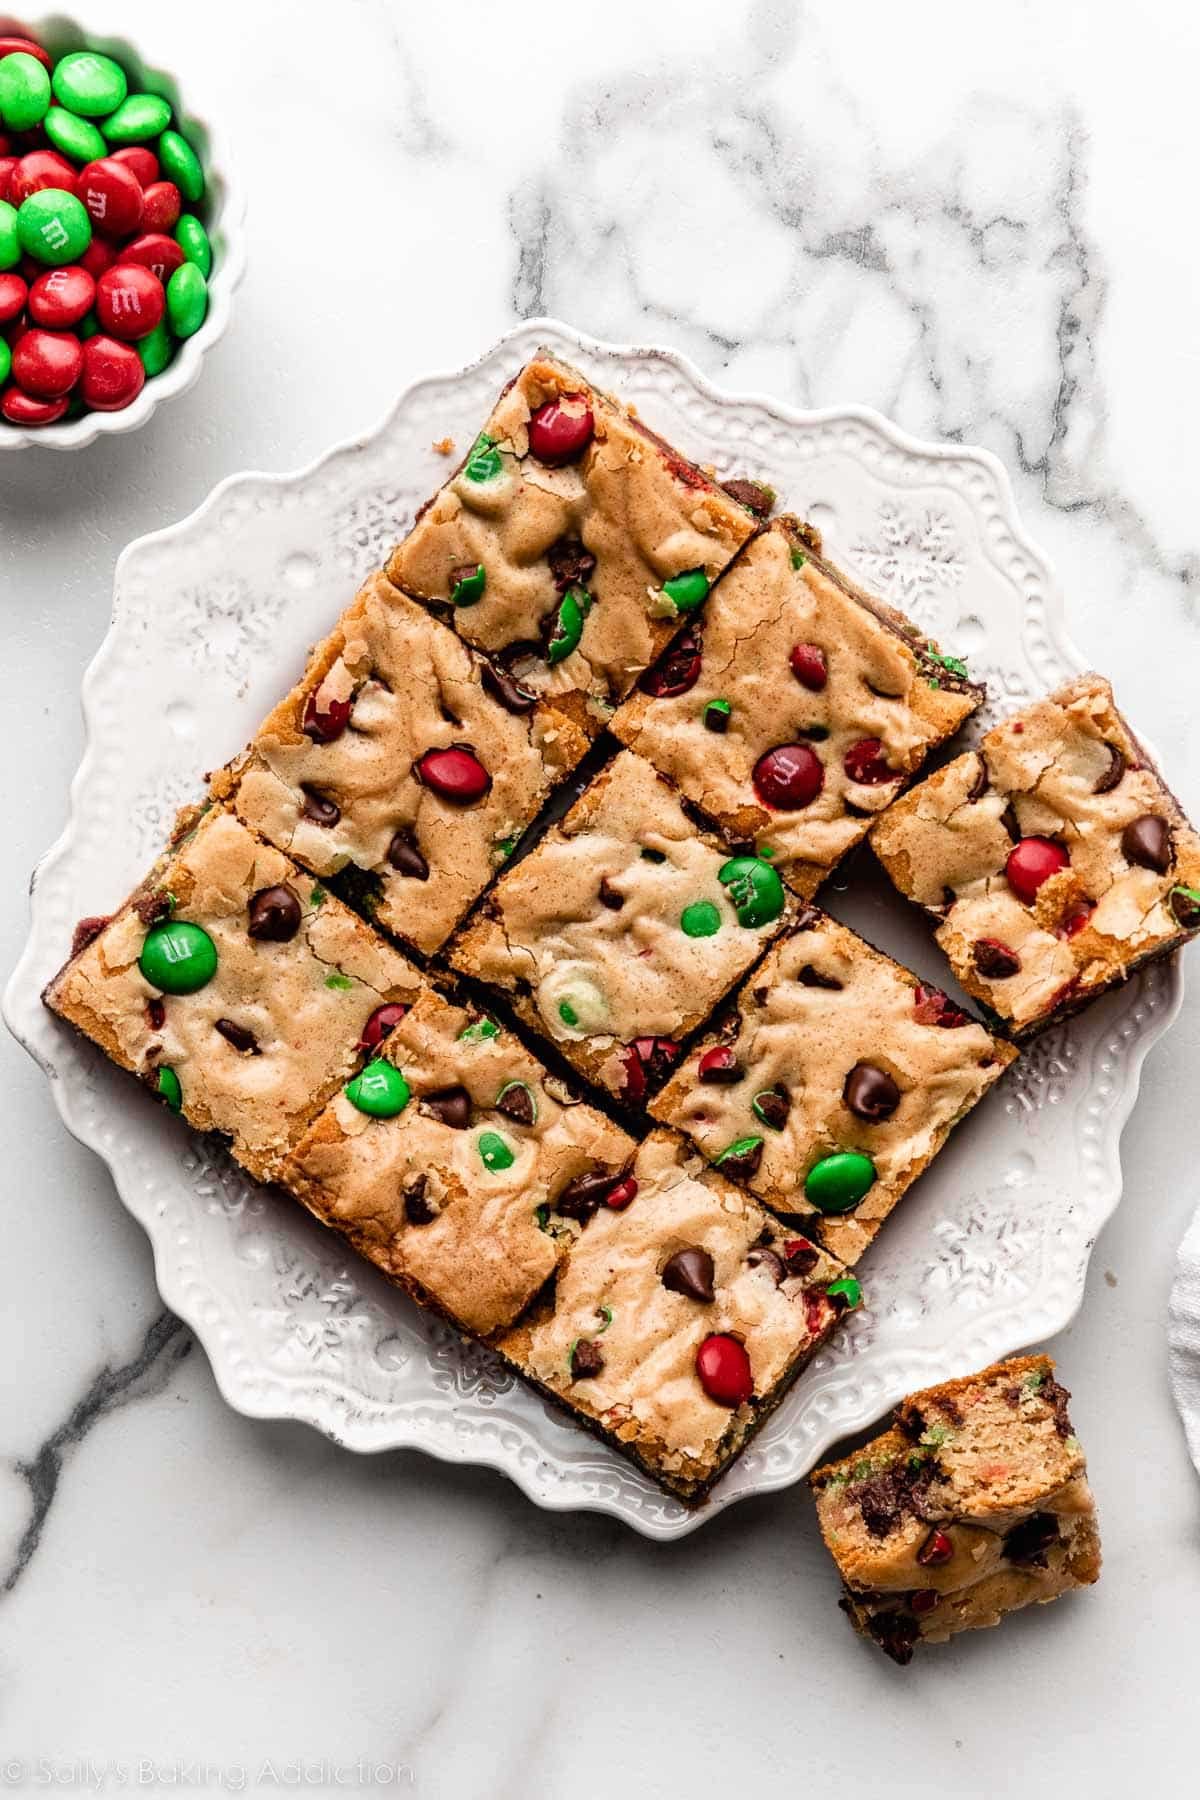
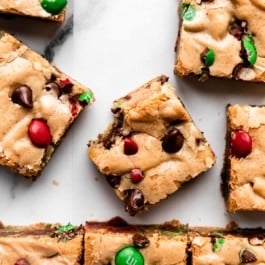
Let’s call these no-chill, no-roll M&M cookies! When you need a big batch of cookies but are pressed for time (or mental energy, LOL), cookie bars are the solution. This recipe makes a generously sized 9×13-inch pan of M&M cookie bars, perfect for sharing, especially at the holidays. Kids love these, but so do adults. Seriously, aside from special diets, have you ever met anyone who would turn down a chewy chocolate chip M&M cookie bar? I’m pretty sure I haven’t!
Here’s Why You’ll Love These M&M Cookie Bars
- Like a bigger batch of soft chocolate chip cookie bars—with colorful M&M candies!
- Makes a large pan to serve a crowd.
- A great recipe for young bakers to help with.
- No mixer, no dough chilling, no dough ball rolling—no fuss!
- Soft in the center, crisp around the edges.
- As easy as a box mix, but way more delicious.
- Add chocolate chips or white chocolate chips for texture variety.
- Choose your color M&Ms to match a holiday or theme.
Unlike these soft-baked M&M cookies, there’s no dough chilling or rolling dough into individual balls and baking in batches. The only waiting you’ll have to suffer through is for the pan to cool for 1 hour before you cut them into bars. (I know, I’m sorry.)
Easy Ingredients, No Mixer
Like with these favorite chewy chocolate chip cookies, using melted butter makes for the softest, chewiest bar cookies. I usually like to use melted butter in bar recipes like brownies and blondies because the bars taste chewy, not cakey. I tested this recipe with creamed softened butter, and the baked result ended up looking more like a puffy sheet cake.
Using melted butter also means you don’t need an electric mixer to make these bar cookies, AND you get that shiny, crackled look on top similar to brownies.
This recipe is similar to the Super Chewy Chocolate Chip Cookie Bars on page 28 of Sally’s Cookie Addiction, but I reduced the sugar a bit, since M&Ms are so sweet. We’re doing away with the extra egg yolk, and instead ensuring softness with an extra 1/2 teaspoon of cornstarch.
It’s also similar to my smaller recipe for chocolate chip cookie bars, but scaled up to make a full 9×13-inch pan. Here’s everything you need:

- Flour: All-purpose flour is the base of this recipe.
- Baking Soda: Baking soda helps these bars rise as they bake.
- Cornstarch: Cornstarch gives the cookie bars that ultra-soft consistency we all know and love.
- Salt: Salt adds flavor and balances the sweetness.
- Butter: Use melted butter in this recipe for the chewiest cookie bars. Because we use melted butter, there’s no need to get out your mixer.
- Sugar: I like to use a mix of brown sugar and white granulated sugar this recipe. More brown sugar than white granulated sugar promises an extra soft and chewy cookie bar because there’s more moisture in brown sugar.
- Eggs: Eggs bind everything together and add richness.
- Vanilla Extract: Pure vanilla extract adds flavor. If you have any homemade vanilla extract, use that!
- M&M Candies: Use regular-size, mini, or a mix of both. I also like to crush up about 1/4 cup of the M&Ms so some are broken, and sprinkle some on top. Totally optional—just adds some texture variety. You can even use different colors for different holidays. I love using red, white, and blue M&Ms for one of my 4th of July desserts.
- Chocolate Chips: I typically use semi-sweet chocolate chips, but feel free to swap them for white chocolate chips, peanut butter chips, or butterscotch chips.
Have I Mentioned No Dough Chilling?
Just melt, mix, press, and bake! Chant it in your head while you get out the ingredients. Melt, mix, press, bake! Melt, mix, press, bake! No dough chill! No dough chill!
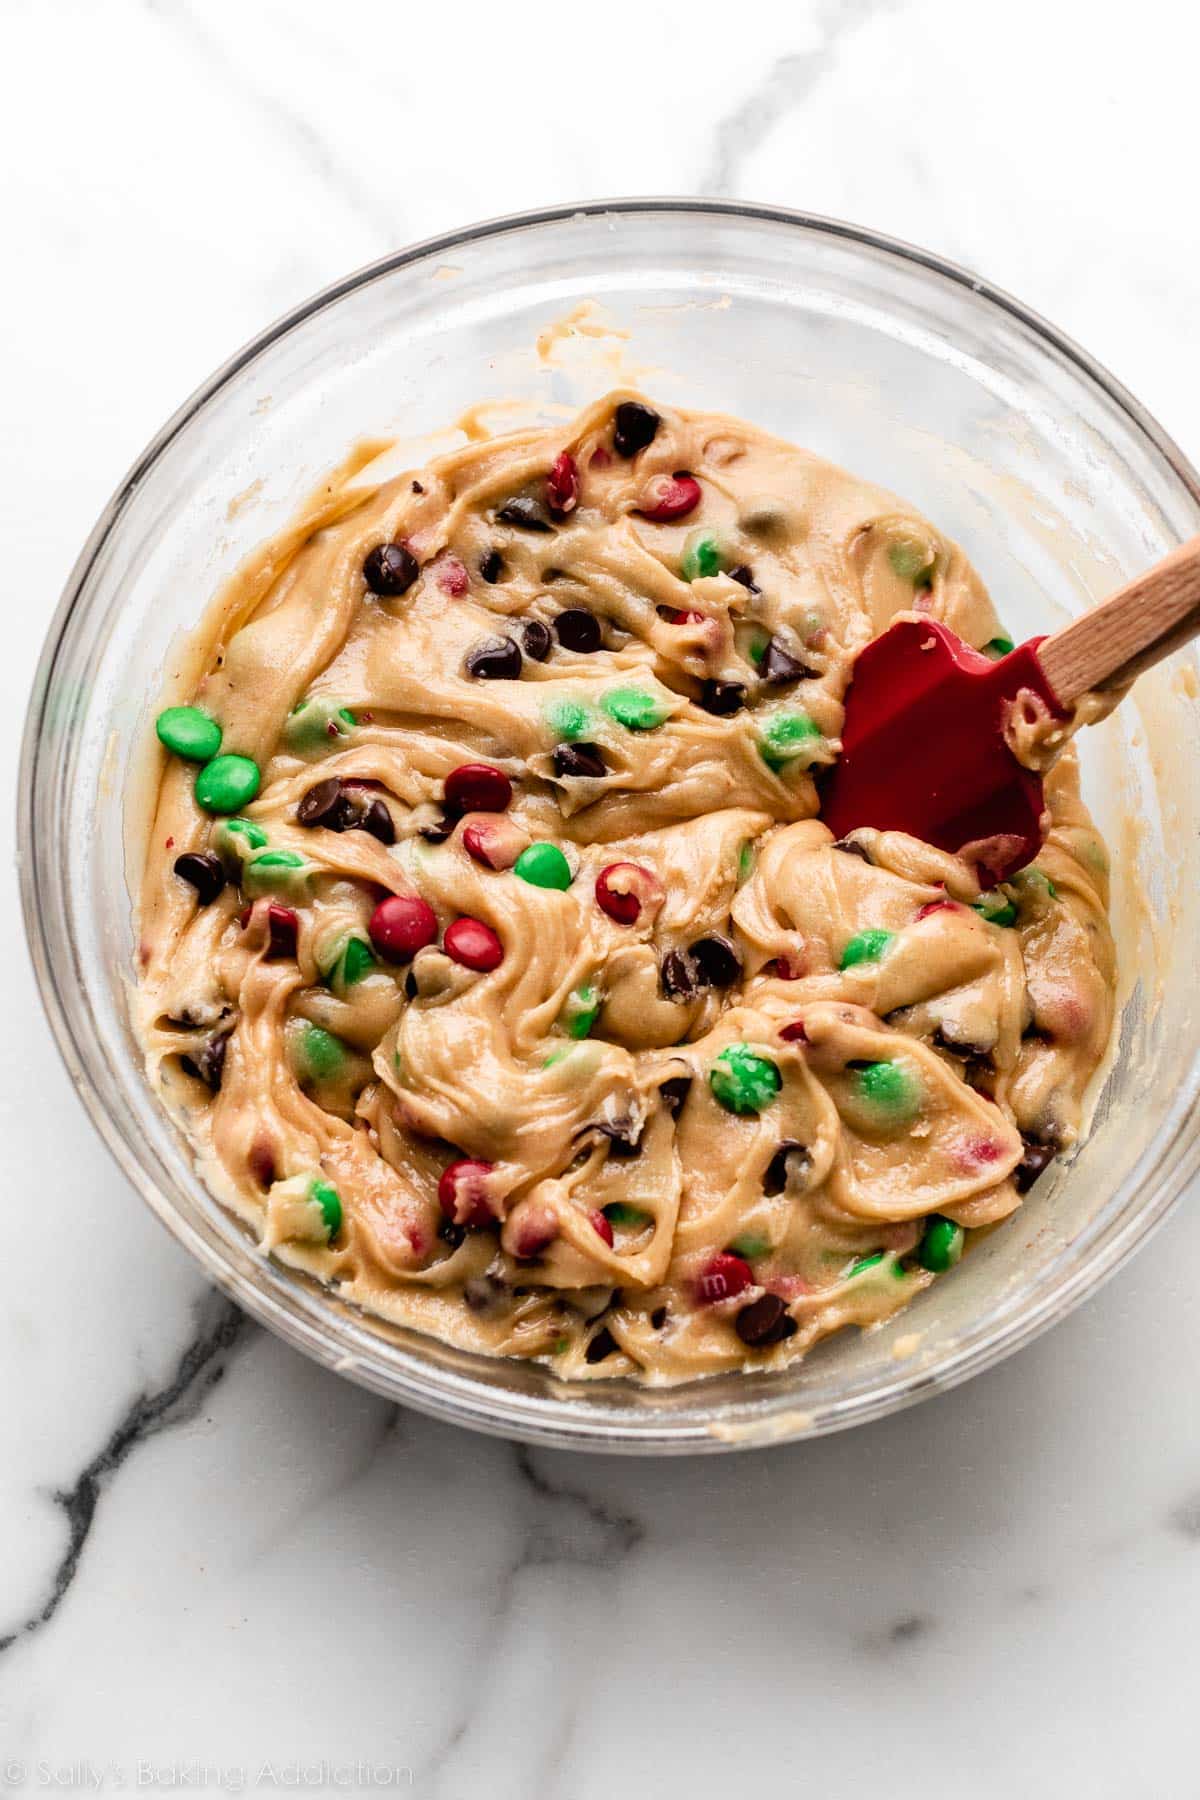
The dough will be slick from the melted butter, but should be easy enough to spread/press into the pan. In fact, it doesn’t even look like regular cookie dough and you might remember that from a batch of these chewy chocolate chip cookies. Before & after adding your add-ins:

I strongly recommend lining the baking pan with parchment paper (with overhang on the sides) to make cutting into bars easier. Spread the dough into the pan:
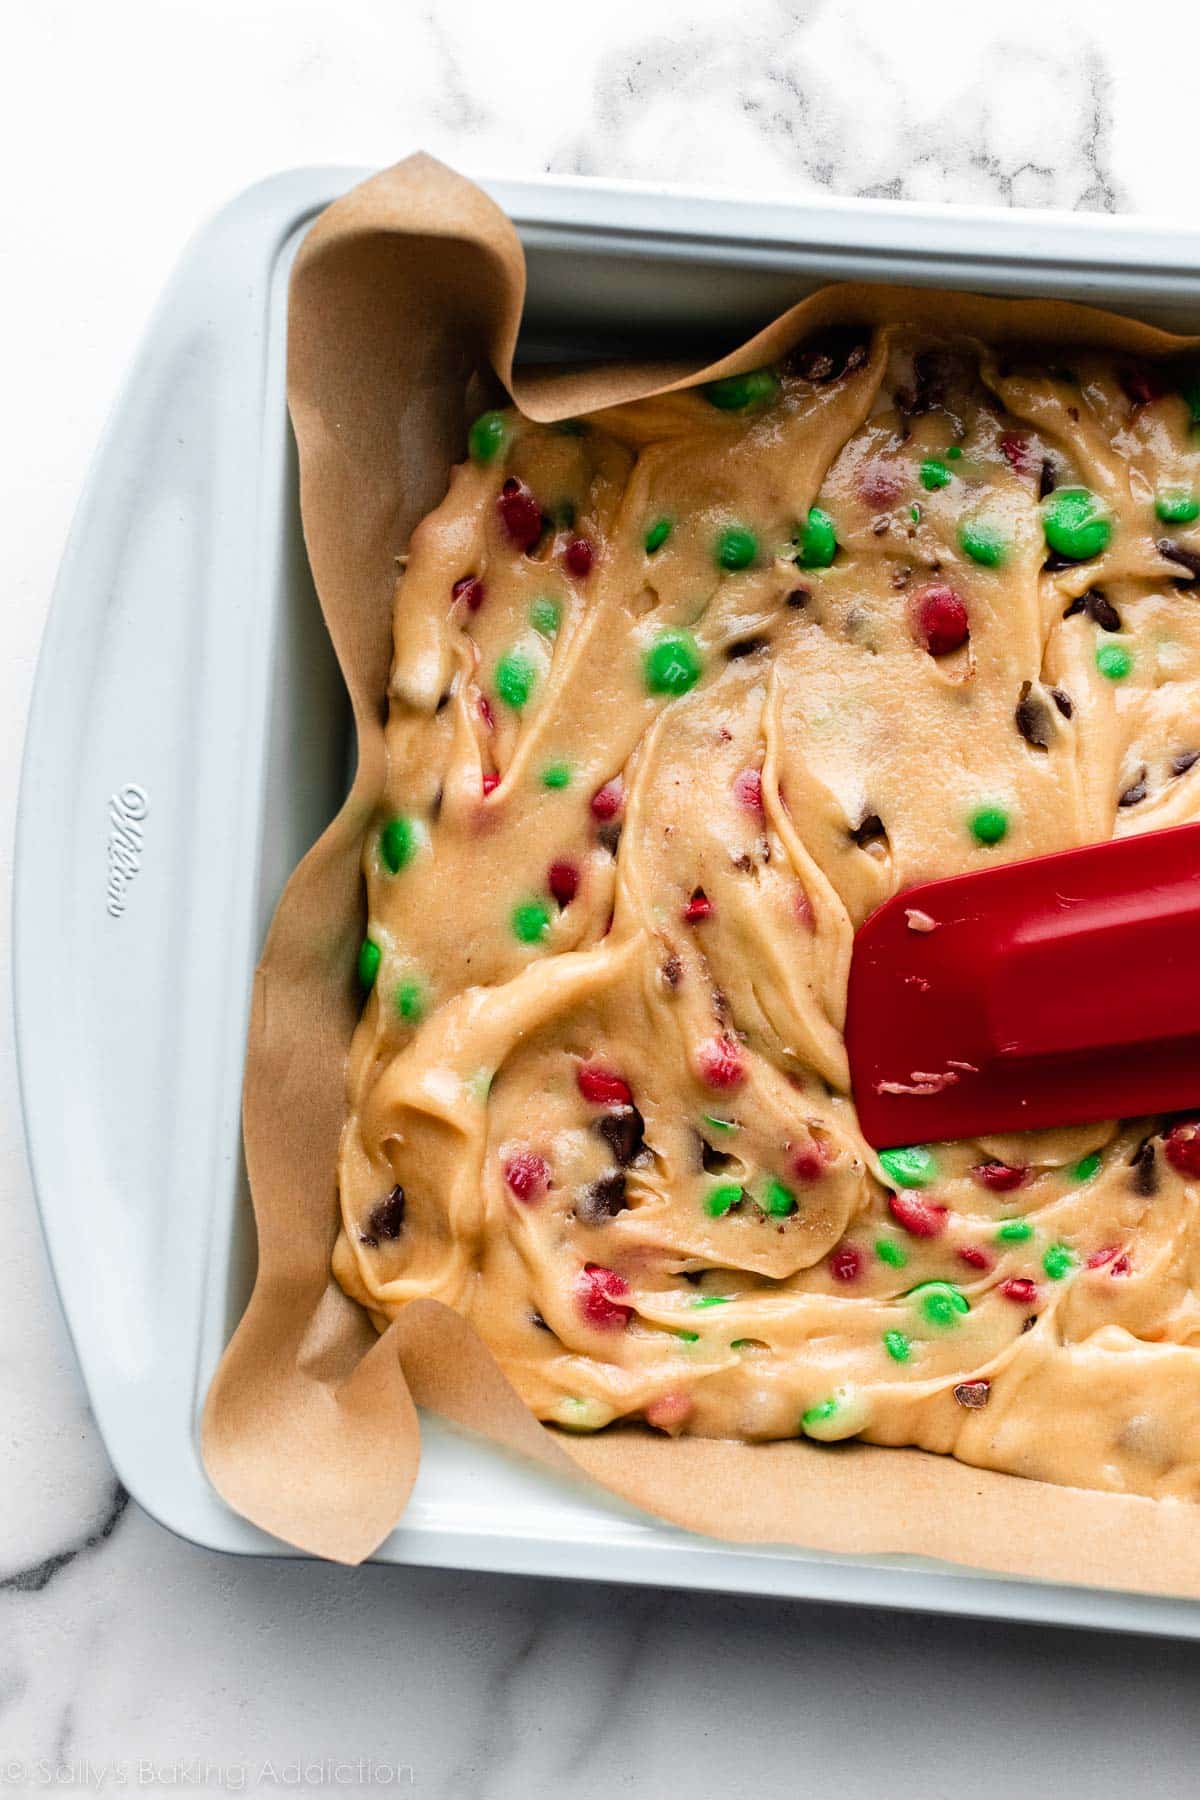
It’s almost gooey-like, so it’s easier to spread than regular, creamy-thick cookie dough. Bake for just 26–30 minutes and avoid over-baking:

I press a few more M&Ms and chocolate chips into the tops of the warm cookie bars, for looks. This is optional. Cool the bars for 1 hour inside the pan, then simply lift the whole thing out using the parchment paper lining. Set it onto a cutting board and slice. They’ll still be a bit warm and that’s fine!
Success Tips for M&M Cookie Bars
- Line the pan so you can easily remove the bars as a whole and slice them, just like I recommend when making rice krispie treats, too.
- Don’t over-bake. Check the bars around 24 minutes into baking, and if you notice they’re browning too much, tent foil over the pan for the remaining bake time.
- Wait at least 1 hour to slice, for neat slices.
Feel Free to Pipe Some Buttercream Decor
These M&M cookie bars are fabulous on their own, but then again, a little frosting is always a good idea. My favorite chocolate buttercream is far from basic; it’s incredibly creamy, silky, smooth, and rich. Even though it’s wonderfully creamy, it holds its shape well, and is perfect for piping. It makes a delicious and beautiful finishing touch on this chocolate chip cookie cake, and would have the same effect on these cookie bars if you want to add some flair!
Sally’s Cookie Palooza
This recipe is part of my annual cookie countdown called Sally’s Cookie Palooza. It’s the biggest, most delicious event of the year! Browse dozens of cookie recipes over on the Sally’s Cookie Palooza page including:
- Peanut Butter Blossoms
- Christmas Sugar Cookies
- Andes Mint Cookies
- Chocolate Crinkle Cookies
- Shortbread Cookies
- Gingerbread Cookie Bars
and here are 75+ Christmas cookies with all my best success guides & tips.
Soft M&M Cookie Bars
- Prep Time: 15 minutes
- Cook Time: 27 minutes
- Total Time: 1 hour, 40 minutes (includes slight cooling)
- Yield: 24 bars
- Category: Dessert
- Method: Baking
- Cuisine: American
Description
Think of these bars as no-chilling, no-rolling EASY M&M cookies! Using melted butter, more brown sugar than white sugar, and a touch of cornstarch guarantee the absolute softest, chewiest M&M cookie bar texture.
Ingredients
- 2 and 3/4 cups (343g) all-purpose flour (spooned and leveled)
- 1 and 1/2 teaspoons cornstarch
- 1 teaspoon baking soda
- 1/2 teaspoon salt
- 1 cup (16 Tbsp; 226g) unsalted butter, melted & cooled for just 5 minutes*
- 1 cup (200g) packed light or dark brown sugar
- 1/2 cup (100g) granulated sugar
- 2 large eggs, at room temperature
- 2 teaspoons pure vanilla extract
- 1 and 1/4 cups (about 260g) mini or regular-size M&Ms
- 3/4 cup (135) semi-sweet chocolate chips
Instructions
- Preheat the oven to 350°F (177°C). Adjust oven rack to the center rack position. Line the bottom and sides of a 9×13-inch metal or glass baking pan with parchment paper, leaving an overhang on the sides to easily lift the bars out of the pan. Set aside.
- Whisk the flour, cornstarch, baking soda, and salt together in a large bowl. Set aside.
- In a medium bowl, whisk the melted butter, brown sugar, and granulated sugar together until no brown sugar lumps remain. Whisk in the eggs and vanilla extract. Pour this into the flour mixture and mix together with a large spoon or silicone spatula. The dough will be very soft, slick, and thick. Fold in the M&Ms and chocolate chips. The M&Ms and chips may not stick to the dough because of the melted butter, but do your best to combine them.
- Transfer dough to the prepared baking pan and press/smooth into an even layer. Bake for 26–30 minutes or until lightly browned on the sides and top and a toothpick inserted in the center comes out mostly clean with a few moist (not wet) crumbs. Do not over-bake. If you notice the bars browning too much before 25 minutes, tent the pan with foil. Bars puff up in the oven, but settle as they cool.
- Allow the bars to cool in the pan set on a wire rack for at least an hour. While they’re still warm, I like to press a few more M&Ms and chocolate chips into the tops, just for looks (optional!). Once relatively cool, lift the bars out of the pan using the overhang on the sides and cut into squares.
- Cover leftover bars and store at room temperature for up to 1 week.
Notes
- Make Ahead & Freezing Instructions: You can make the cookie dough and chill it in the refrigerator for up to 3 days or freeze for up to 3 months. Allow to come to room temperature and continue with step 4. Baked and cooled cookie bars freeze well for up to 3 months. Thaw bars overnight in the refrigerator and bring to room temperature before serving.
- Special Tools (affiliate links): 9×13-inch Glass Baking Pan or Metal Baking Pan | Parchment Paper | Glass Mixing Bowls | Whisk | Silicone Spatula | Cooling Rack
- Cornstarch: If you don’t have cornstarch, you can leave it out. The cookie bars will still be soft.
- Butter: Avoid letting the melted butter cool for too long, otherwise your dough will be crumbly instead of soft (and your cookie bars can end up cakey). You want it still warm, but not hot enough to begin cooking the eggs.
- M&Ms: You can use regular-size, mini, or a mix of both. I like to crush some of them, too, to sprinkle on the top before baking. Totally optional!
- Do I have to add chocolate chips? You can skip the chocolate chips. If you skip them, increase M&Ms to 1 and 1/2 cups (about 300g). You could also replace the chocolate chips with white chocolate chips, butterscotch chips, or peanut butter chips.
- 9-Inch Square Pan: To make a smaller 9-inch pan of cookie bars, use this similar scaled-down recipe for chocolate chip cookie bars. For the add-ins, use 1 cup (200g) of M&Ms and 1/2 cup (90g) chocolate chips.


Could I make these gluten free as long as I used a 1:1 GF flour??? I’ve made them several times with regular flour, but a friend recently had to take on a gluten free diet.
Hi Michelle, we haven’t tested these with a 1:1 gluten free flour, so we’re unsure of exact results. Let us know if you do give it a try!
Hi Sally & team!
Could you replace the chocolate chips with Lucky Charms marshmallows, for a St Patrick’s Day themed treat?
Hi Rachel, can’t see why not!
I made these chocolate chip bars today, but I was disappointed. They were too dry. I baked them at the minimum time.
The best m&m cookie bars, hands down. I love how thick and soft they are. Great recipe!
Can I substitute the m&ms for chocolate chips?
Absolutely.
Hi these look delicious, just wondering, how long can you store these (refrigerated) after they’ve been baked, without icing?
You can store these bars at room temperature for up to 1 week. Baked and cooled cookie bars freeze well for up to 3 months. Thaw bars overnight in the refrigerator and bring to room temperature before serving.
Such an easy and delicious cookie bar recipe! It’s so soft and chewy, exactly the texture I was hoping for!
Can you use two 8×8 pans?
Shouldn’t be a problem! Bake time will be shorter.
We love this recipe, and have made it several times. I read in your notes that you can freeze the dough ahead of time, but do these freeze well after being baked?
Hi Nanc, they do! Baked cookies freeze well for up to 3 months.
I made this recipe a few days ago and it turned out perfect!! Apparently I mis-read the recipe and sprinkled on the extra M&Ms and chocolate chips before baking them but it was not an issue at all. After looking at the pictures of how the dough was supposed to be, I was a little worried that mine was too thick, but they turned out great! These cookie bars were soft and chewy and the flavor was amazing… I liked them better than M&M cookies. They were super easy to make (I’m 12) and I will definitely be making them again soon (and trying the chocolate chip cookie bars)!! I have never been let down by a Sally recipe!
I made this recipe and it turned out perfect!! These cookie bars were soft and chewy and the flavor was amazing… I liked them better than M&M cookies. They were super easy to make (I’m 12) and I will definitely be making them again soon!! I have never been let down by a Sally recipe!
I’ve baked these twice now and they came out pretty good but a little dry. Any tips on what I could be doing wrong or suggestions?
Hi Chris! Be very careful not to over-bake as all ovens are a little different. They may need less time. Also, how did you measure the flour? Make sure to spoon and level (instead of scooping) to avoid packing in too much flour into your measuring cups – or use a kitchen scale. You can read more about properly measuring baking ingredients in this post.
Have these in the oven right now.
Do you have any suggestions about cutting them? I am worried about the hard shell on the candy.
Do you use a serrated or regular blade? Suggestions / recommendations *greatly* appreciated.
Hi Tracy! A sharp regular blade does the trick.
I was looking for easy recipe to make for a cookie exchange, and decided to give this a try. I’m not the most confident baker, but these were so easy to make. They took around 28 minutes and are perfectly soft, chewy and delicious. I’ll definitely be adding this to my annual cookie platter.
Not a good recipe. Baked as instructed, super jiggly in the center and pretty much raw. Continued to cook longer with foil on top as instructed in the comments as well as keeping in mind that it is okay to be a bit jiggly in the middle as it will continue to bake as it cools. Baked for 30min uncovered, and then an additional 15min covered and they still came out raw in the middle. Probably better to half the recipe and bake in a 8×8 or 9×9.
Hi Alexia, the dough shouldn’t jiggle. I wonder if you accidentally left an ingredient out or mismeasured something? Did you let them cool completely? Because the centers will be extremely soft when coming out of the oven. The longer they sit and cool, the more they set up.
Can you add chopped walnuts instead of chocolate chips
Hi Sherri, absolutely!
Just made them to take to a party.
Came out perfect! Mine look just like your photos.
Thank you!
Love all your recipes!!
Too bad I read the reviews after I made these bars, it all turned out raw in the middle. I tried to save my double batch and bake longer, it still remained raw and super greasy. Waste of ingredients. Not happy.
How to not get a sunken middle when baking bars? Each time I bake these or or chocolate chip bars in a 9×13 pan, the middle is sinks down as it cools. How do I avoid this?
Hi Ellen! This is normal since the edges bake faster than the middle. If the edges or top are browning too much, you can tent the pan with foil while baking.
Obviously I don’t know what I could’ve done differently.. I followed the recipe exact, and I just don’t know, they weren’t done at 25 minutes or at 30 minutes the edges were getting to done but the middle was way to wet still, I did this twice once with a glass pan once with a metal pan , ended up covering with tin foil for an additional 7 mins by then I feel like they are just over done. Cooked on 350. I don’t know if I care for this recipe.
Hi Tabby, thank you for giving these cookie bars a try. We’re happy to help troubleshoot. It’s normal for the centers of the bars to be softer than the edges, and tenting them with foil is a great way to ensure the middles keep baking while preventing the edges from becoming too crisp. Baking times can vary by oven, so it’s okay if you have to add a few additional minutes of bake time. Keep in mind that the centers will continue to firm up during the cooling process, too. Thank you again for giving them a try!