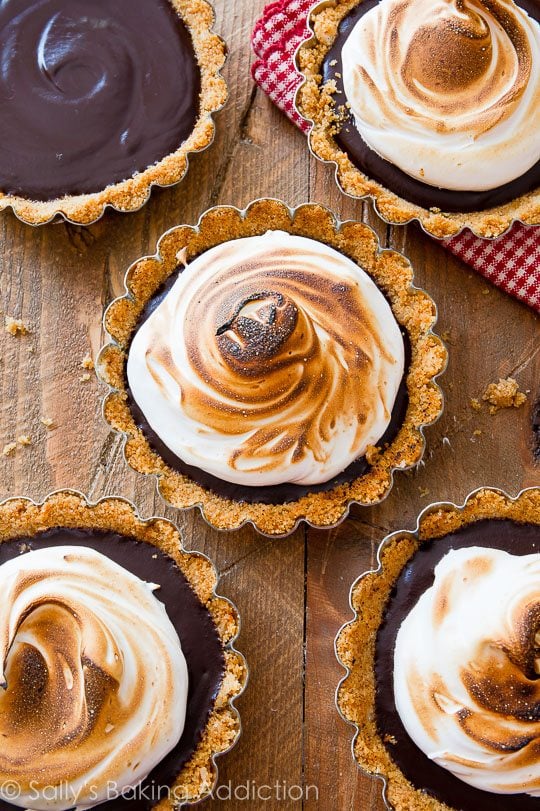
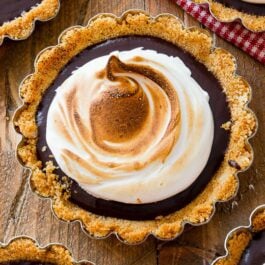
Skip the campfire and make these adorable s’mores tartlets at home! With a buttery graham cracker crust, smooth chocolate ganache filling, and toasty meringue topping, each bite tastes like a summertime s’more. You only need a few basic ingredients to begin.

Today we’re making mini s’mores tartlets, no campfire required. I love creating new, delicious ways to combine all of our favorite components of this nostalgic campfire treat. These ganache-filled tarts are simply divine—boasting traditional s’mores texture and flavor in each adorable mini tart pan. You’ll appreciate the minimal ingredient list and how quickly these come together. They’re really fun to make and serve, so let’s get started!
Why You’ll Love These S’mores Tartlets
- Simple to prepare
- Completely homemade
- You only need 10 ingredients
- Lots of texture in each bite
- Served in adorable mini tart pans
- Make them year-round, no campfire needed
- The star of any party
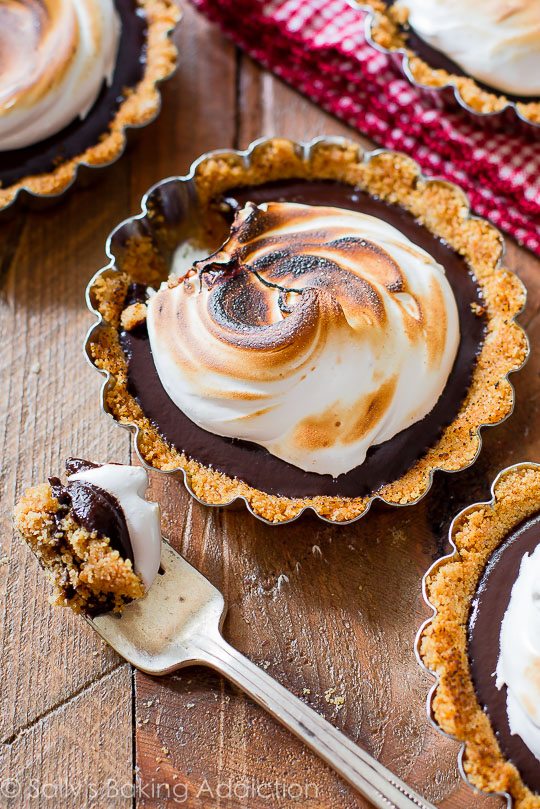
3 Parts to S’mores Tartlets
Trust me when I say this: these mini tarts are actually very simple to prepare. They really are! There are 3 parts to make, and each comes together easily. With so few ingredients, each has an important job to do. I don’t recommend substitutions.
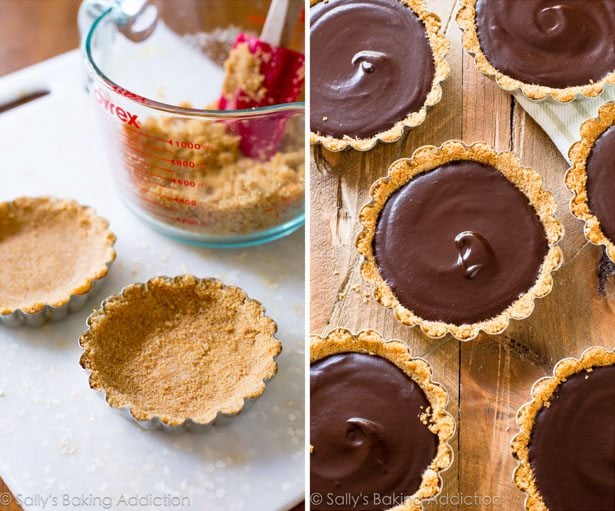
- Graham Cracker Crust: We’ll combine 3 ingredients to make the graham cracker crust: graham cracker crumbs, melted butter, and a little sugar. Press the crust into the tartlet pans. Really press it in there nice and tight. If you do not have individual tartlet pans, I share details about other pans to use below. And if you live outside the US and can’t find graham crackers, see Notes for alternatives.
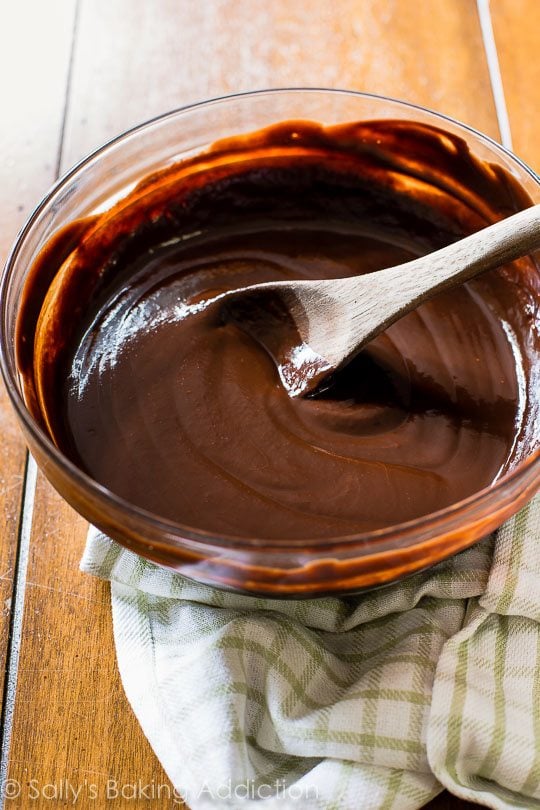
- Chocolate Ganache Filling: This is an upgraded chocolate ganache with a smooth, buttery texture. You’ll heat the cream and pour this hot cream over chopped chocolate + butter for an incredibly rich chocolate filling.
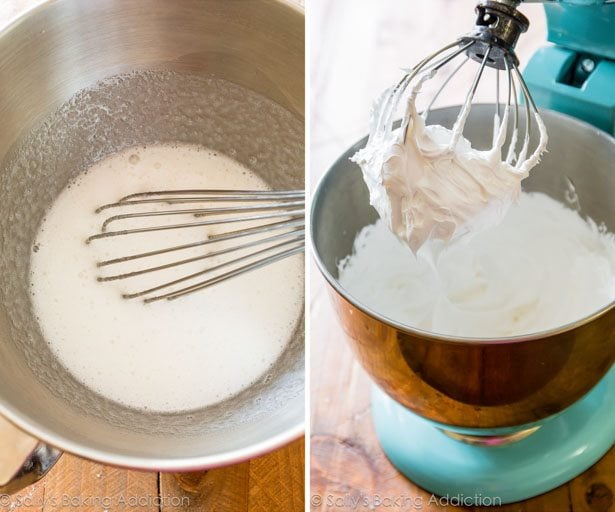
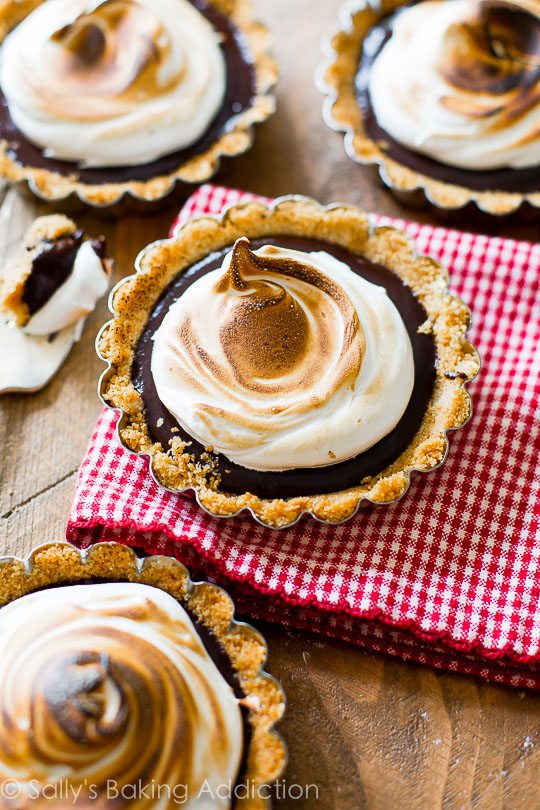
- Marshmallow Topping: AKA homemade marshmallow creme. It’s fluffy and airy, just like marshmallows, and is made from gently heating and whisking sugar, egg whites, cream of tartar, and a little vanilla extract. Cream of tartar is crucial to marshmallow topping success. It stabilizes the egg whites, allows the egg whites to maintain their texture when whipped into stiff peaks, and increases the egg whites’ tolerance to heat—very helpful if you toast the marshmallow topping like I did. When toasted, it tastes like a marshmallow roasted over a campfire—perfect for our s’mores tartlets. I like to use a kitchen torch for the toasty topping!
What Pans to Use?
For these s’mores tartlets, I recommend individual pans because the tarts are a little hard to remove from the pans for serving (and mini desserts are always adorable!). So, I serve them in individual tartlet pans.
If you do not have individual tartlet pans, use a muffin pan to make about 16 tartlets, and make sure you use cupcake liners so you can get them out of the pan! You can also make this recipe into a 9-inch tart using a tart pan. It will be easy to slice and remove from the full-size tart pan.
No matter which pan you use, pre-bake the crust for 10 minutes.
More S’mores Recipes
- S’mores Chocolate Mousse
- S’mores Brownie Cupcakes
- S’mores Chocolate Chip Cookies
- No Bake S’mores Cake
- S’mores Brownie Pie
- S’mores Chocolate Chip Cookie Cake
- Toasted S’more Chocolate Chip Cookies
- S’mores Rice Krispie Treats
S’mores Tartlets
- Prep Time: 45 minutes
- Cook Time: 10 minutes
- Total Time: 2 hours, 45 minutes
- Yield: 8 tartlets
- Category: Dessert
- Method: Baking
- Cuisine: American
Description
You won’t miss the campfire or the sticky fingers when you try these mini s’mores tartlets.
Ingredients
Crust
- 1 and 1/2 cups (180g) graham cracker crumbs (about 12 full sheet graham crackers)
- 6 Tablespoons (85g) unsalted butter, melted
- 1/4 cup (50g) granulated sugar
Filling
- 12 ounces (339g) semi-sweet chocolate, coarsely chopped
- 1/4 cup (4 Tbsp; 56g) unsalted butter, cubed
- 1 cup (240ml) heavy cream or heavy whipping cream
Marshmallow Meringue Topping
- 2 large egg whites, at room temperature
- 1/2 cup (100g) granulated sugar
- 1/8 teaspoon cream of tartar*
- 1 teaspoon pure vanilla extract
Instructions
- Preheat oven to 350°F (177°C).
- Make the crust: Read my tips about making a perfect graham cracker crust before you get started. Using a food processor or blender, grind graham crackers into fine crumbs. (Alternatively, you can crush them in a plastic bag with a rolling pin.) In a medium bowl, mix graham cracker crumbs, melted butter, and granulated sugar until combined. (The mixture will be thick, coarse, and sandy.) Press crumbs evenly into each tartlet pan, making sure the crust is tight and compact. Pre-bake crusts for 10 minutes, then let cool.
- Make the filling: Place chocolate and butter in a large bowl and set aside. In a small saucepan over medium-low heat, heat heavy cream. Whisking constantly, bring to a slow boil. Once it begins to boil, immediately remove from heat and pour over chocolate. Using a wooden spoon, slowly stir until chocolate and butter are completely melted and ganache is smooth.
- Pour the filling evenly into each crust and place each tartlet pan in the refrigerator. Chill at least 2 hours (and up to 1–2 days) or until completely firm.
- Just before serving, prepare topping: Place egg whites, sugar, and cream of tartar in the heatproof bowl of an electric mixer. Set bowl over a saucepan containing about 2 inches of simmering water (making sure the bowl isn’t touching the water below). Whisk constantly until sugar is dissolved and egg whites are warm to the touch, about 4 minutes. Transfer the mixing bowl to an electric mixer fitted with a whisk attachment. Beat on high speed for 4–5 minutes until soft, glossy peaks form. Add vanilla and beat on high until just combined.
- Remove tartlets from the refrigerator. Spread marshmallow topping on each. Toast the topping with a kitchen torch* if desired. Serve immediately. Any leftover tarts keep well in the refrigerator, in an airtight container, for up to 3 days.
Notes
- Make Ahead Instructions: Prepare tarts through step 4 and keep the tarts in the refrigerator for up to 2 days as instructed in step 4.
- Special Tools (affiliate links): Food Processor | Glass Mixing Bowl | Individual Tartlet Pans | Small Saucepan | Electric Mixer (Handheld or Stand) | Kitchen Torch
- Cream of Tartar: Necessary to make the marshmallow topping for both stabilization and texture. There are no alternatives.
- Pans: I recommend individual tartlet pans because the tarts are a little hard to remove from the pans for serving. If you do not have individual tartlet pans, use a muffin pan to make about 16 tartlets—and make sure you use cupcake liners! You can also make this into a regular full-sized tart using a 9-inch tart pan. It will be easy to slice and remove from the full-size tart pan. Pre-bake crust for 10 minutes no matter which size you use.
- Toasted Topping: Do not toast the topping in the oven. The ganache will melt and the topping will lose some shape. You need quick, instant heat from a kitchen torch. Again, it is optional to toast the topping.
- Graham Cracker Crust Alternatives: If you live outside the US and graham crackers aren’t available, you can use 200g ground digestive biscuits instead (about 13–14 biscuits), the same amount of butter, and add a bit more sugar (about 1/3 cup, or 67g). Or you can make an Oreo crumb crust instead: Grind 18 whole Oreos (200g) into crumbs, and combine with 60g melted butter.


I made this recipe because I wanted something s’mores themed for summer. I made it in a 9 inch tart pan and I have to admit, I think there was too much chocolate. I think it would’ve been better with half the amount. Other than that, it was good.
do the tartlet pans have the removable bottom?
Hi Deb, the particular tartlet pans that we used do not have removable bottoms.
From your Creamy Lemon Pie recipe I was directed to this recipe for the meringue topping. Wanted to leave a word of advice to NOT USE kitchenaid glass mixing bowl as double broiler…. Mine cracked and is done for
I’m looking for ways to get rid of some meringue powder I bought last month, and this works perfectly! Quick question, do you need pie weights/beans/rice to pre-bake this crust? My gut says a graham cracker crust wouldn’t puff up, but I want to be sure.
No need – enjoy!
Hi! Could I make this in bigger proportions like a pie? I would love to try it for thanksgiving
Hi Rochelle, We don’t see why not! It may take some testing to get the proportions of crust to filling to topping correct for a full sized pie. Let us know what you try!
Followed the recipe exactly to make mini tarts in mini cupcake liners. The taste was GREAT. Crust was crumbly but still held together enough. I ended up with some leftover Chocolate and marshmallow topping (using it for hot chocolate!)
Sally, can the marshmallow topping be stored for a few days (before torching)?
Hi Kristen, We are so glad you enjoyed these tartlets! Leftovers marshmallow topping is good for up to 2 days in the refrigerator. Baked goods topped with this marshmallow meringue can be left at room temperature for up to 6-8 hours. After that, it’s best to refrigerate or else the topping will begin to wilt. For best taste, texture, and appearance, we do not recommend freezing the marshmallow.
Hi Sally! Could I make the marshmallow topping the night before and just toast the topping right before serving?
Hi Amanda, they’ll be just fine overnight. They’ll be the BEST, though, freshly topped and toasted!
I made these and they came out great! Some tips:
-Mine were a bit too rich and sweet, next time I would only fill the crusts with about 1/2 an inch of chocolate and add salt to my graham cracker crust to balance the sweet.
-The chocolate/butter didn’t fully melt from the heavy cream so I put the bowl over a sauce pan of boiling water and whisked it in there until everything combined.
-Really make sure your sugar melts into your egg whites, it took around 8 minutes for mine to fully melt.
Also, I made these completely the night before and they were still good to go the next day.
Like Stephanie above, I tried the topping a few times and couldn’t get it to thicken to peaks. I live in a very arid environment so I know humidity isn’t the problem, but I wonder if altitude is? I live at almost 6,000 feet above sea level. The first time I made it was with the 1/8 tsp of cream of tartar as was cled for in the recipe. It was wet and runny like milk, so I tossed it and tried again. The second time, I used 1/4 tsp of cream of tartar and it made it a little fluffier, but it was still pretty loose so I added about an 1/8 more while beating it. It thickened a little bit but not enough so I put it on the tartlets and put them in my freezer for a few hours and it stiffened up a little bit. It was flat across the top like a melted marshmallow. I let it thaw before we ate it and it was very gooey, but not runny. Even though the topping was a flop, everyone seemed to love it.
Next time I make this, I am going to try 1 tsp of cream of tartar.
Hi Sally! I’ve tried the meringue a few times now and I cannot get it to turn out stiff no matter what I do! If I’m beating the cooked mixture by hand does it need more time? Could heat and humidity be causing it to be runny? I can’t get it to swirl or make peaks because it’s just not stiff. Tried refrigerating it overnight also to no avail. What am i doing wrong?? I followed your instructions exactly except for mixing it with a hand mixer. Thanks for your help!!
Hi Stephanie! If you’re not getting stiff peaks, there may be a couple issues at hand here– first, make sure there is no fat or grease residue in any of the pans, bowls, spatulas, etc that you are using for the marshmallow meringue. Second, do not let a drop of egg yolk into the mixture either. Fat prevents the meringue from forming its structure. Finally, if there’s humidity and moisture in the air, the meringue won’t really stiffen up at all. If you can choose a drier day to make this, go for it. Sorry you’re having trouble with it!
Hi Sally, this recipe looks wonderful and I can’t wait to try it on Friday!
I will be using my cupcake pan with paper cupcake liners but I had a question. If you use the cupcake mould with the liners, will the graham cracker crust hold to the sides of the cupcake liners or do I only need to do a graham cracker base?
I would ideally love for it to be like the tart with the crust on the bottom and sides.
Thanks!!
You can use liners and press in the graham cracker crust– make sure you’re pre-baking the crusts!
I made this today, and it’s delicious! I doubled the recipe and used two standard, store-bought 9 inch graham cracker pie crusts. It came out of the oven and looked wonderful. I used the leftover egg whites to top it, then broiled it for a few seconds until it was browned. Family loved it!
I can’t wait to make these! What happens if I freeze the tartlets with the marshmallow topping?
If I can’t freeze the marshmallows, how long will they keep?
They don’t thaw very nicely, just letting you know! The s’mores tartlets keep for 2-3 days in the fridge.
Hi Sally! Will the taste and consistency of the marshmallow topping change if i refrigerate it to make it a bit more firm? I was planning to top the graham cracker crust with the marshmallow topping and then cover it with a chocolate shell.
It firms up just a little, yes.
Hi Sally!
Will the marshmallow topping hold up overnight? I want to make sure they are just as pretty when I take to work the next morning
They’ll be just fine overnight. They’ll be the BEST, though, freshly topped!
Hi, what about just toasting some marshmallows to replace the topping?
Thanks!
That definitely works! But do not to toast the marshmallows while they are on top of the ganache– it will melt. See notes.
Yum! Those look amazing! Can’t wait to try ’em! I do not have a blow torch, but would it work to use like a lighter or something?
The ganache underneath might melt a little because a lighter would take longer to toast than the torch would. It’s worth a shot!
I don’t have the metal tartlet pans shown. Would white ceramic ones that are used for mini creme brulee be ok to use in this recipe?
Yes!