Follow this simple recipe and video tutorial for the best all butter pie crust. It will make you a pie expert immediately! Complete with all my tips and troubleshooting, this pie crust recipe is buttery, flaky, and tender with the most incredible flavor.
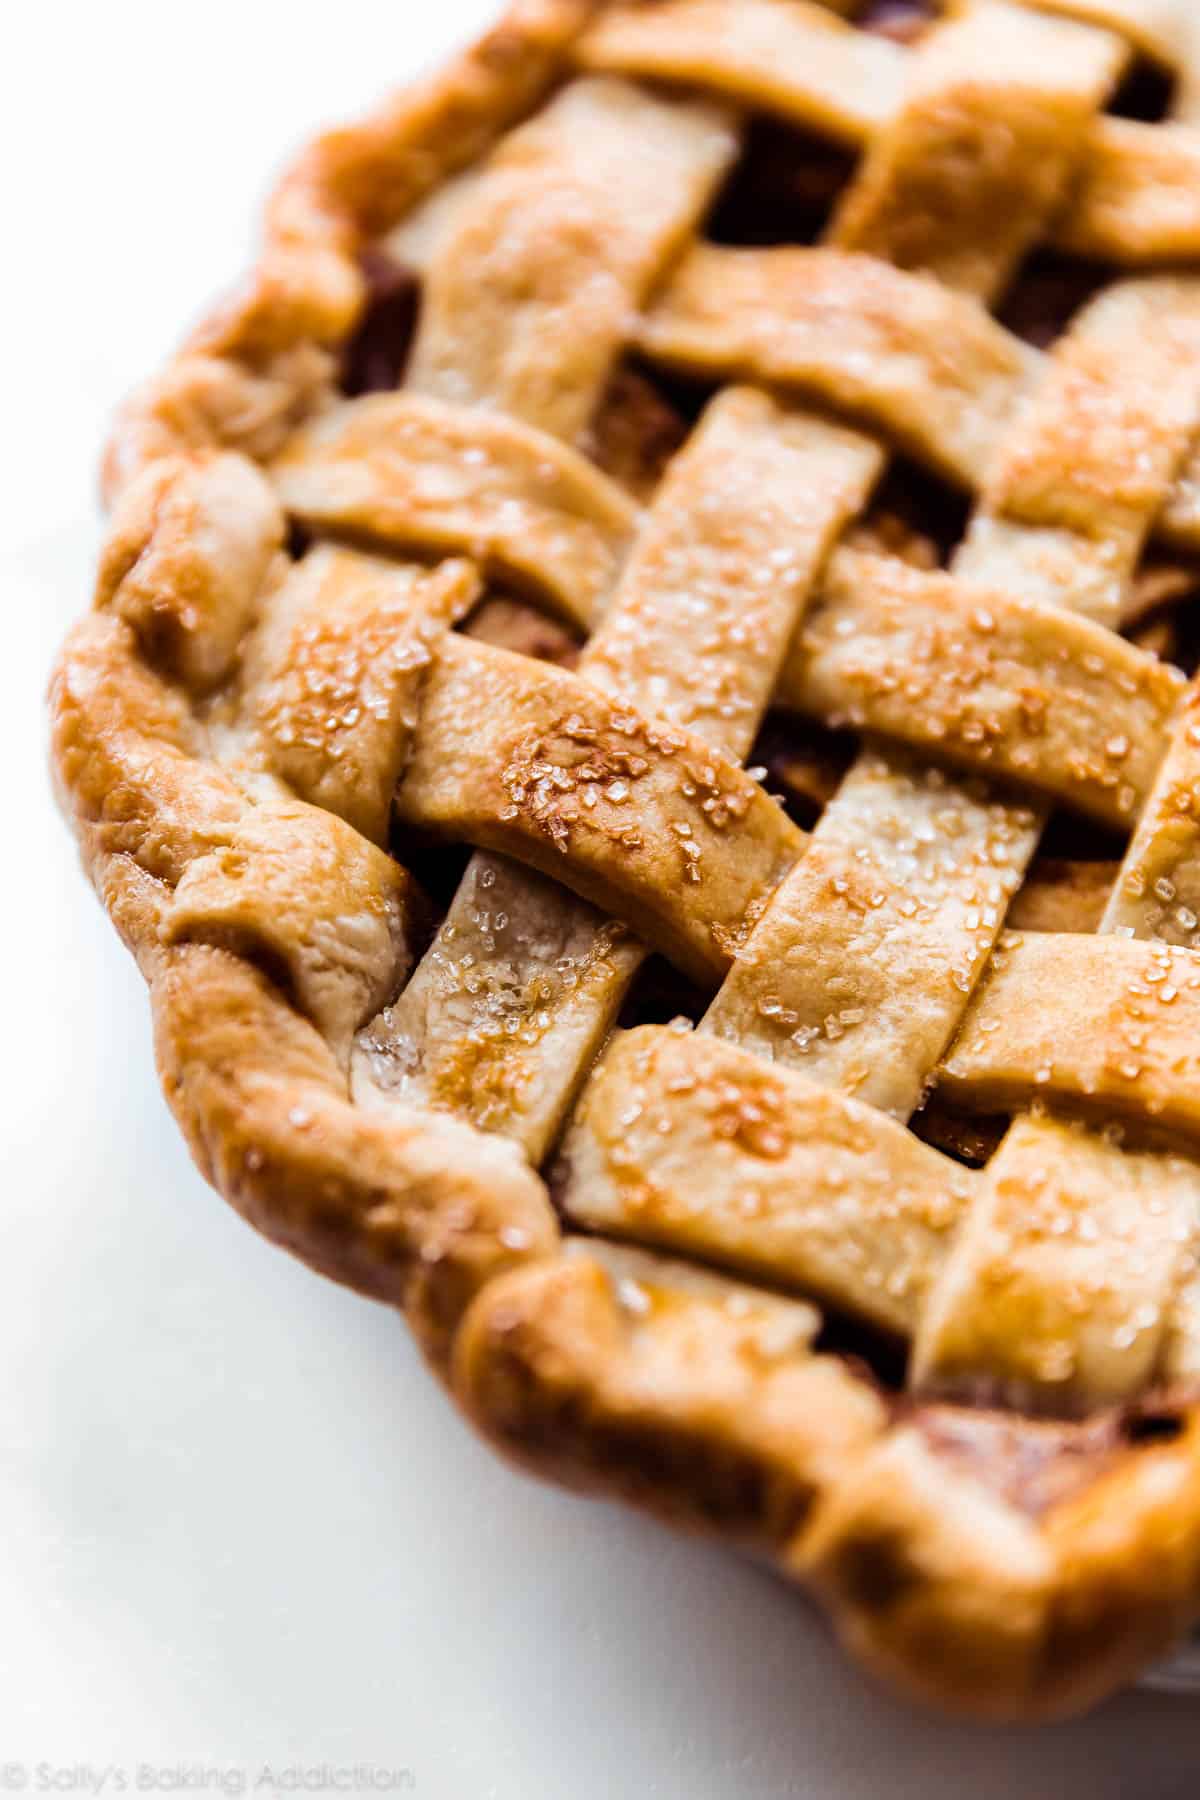
At the request of many, today I’m sharing my go-to all butter pie crust recipe. It competes with my butter and shortening pie crust for the #1 spot in my pie-loving heart. (Scroll to the recipe notes for my pie crust comparison!) I’ve made thousands of pies in my day and consider myself a pie expert. A pi-expert, if you will. I’ve made all the pie crust mistakes so I can coach you through the process and supply you with all the knowledge and confidence to tackle pie crust once and for all.
You’ll be a pi-expert with this recipe and tutorial on your side!
Watch my video tutorial for butter pie crust with lattice topping. This is my homemade apple pie with chai spices, a favorite every Fall season.
Start with a dependable pie crust recipe and you’re set for success. Soon everyone will be asking YOU for all your pie crust secrets.
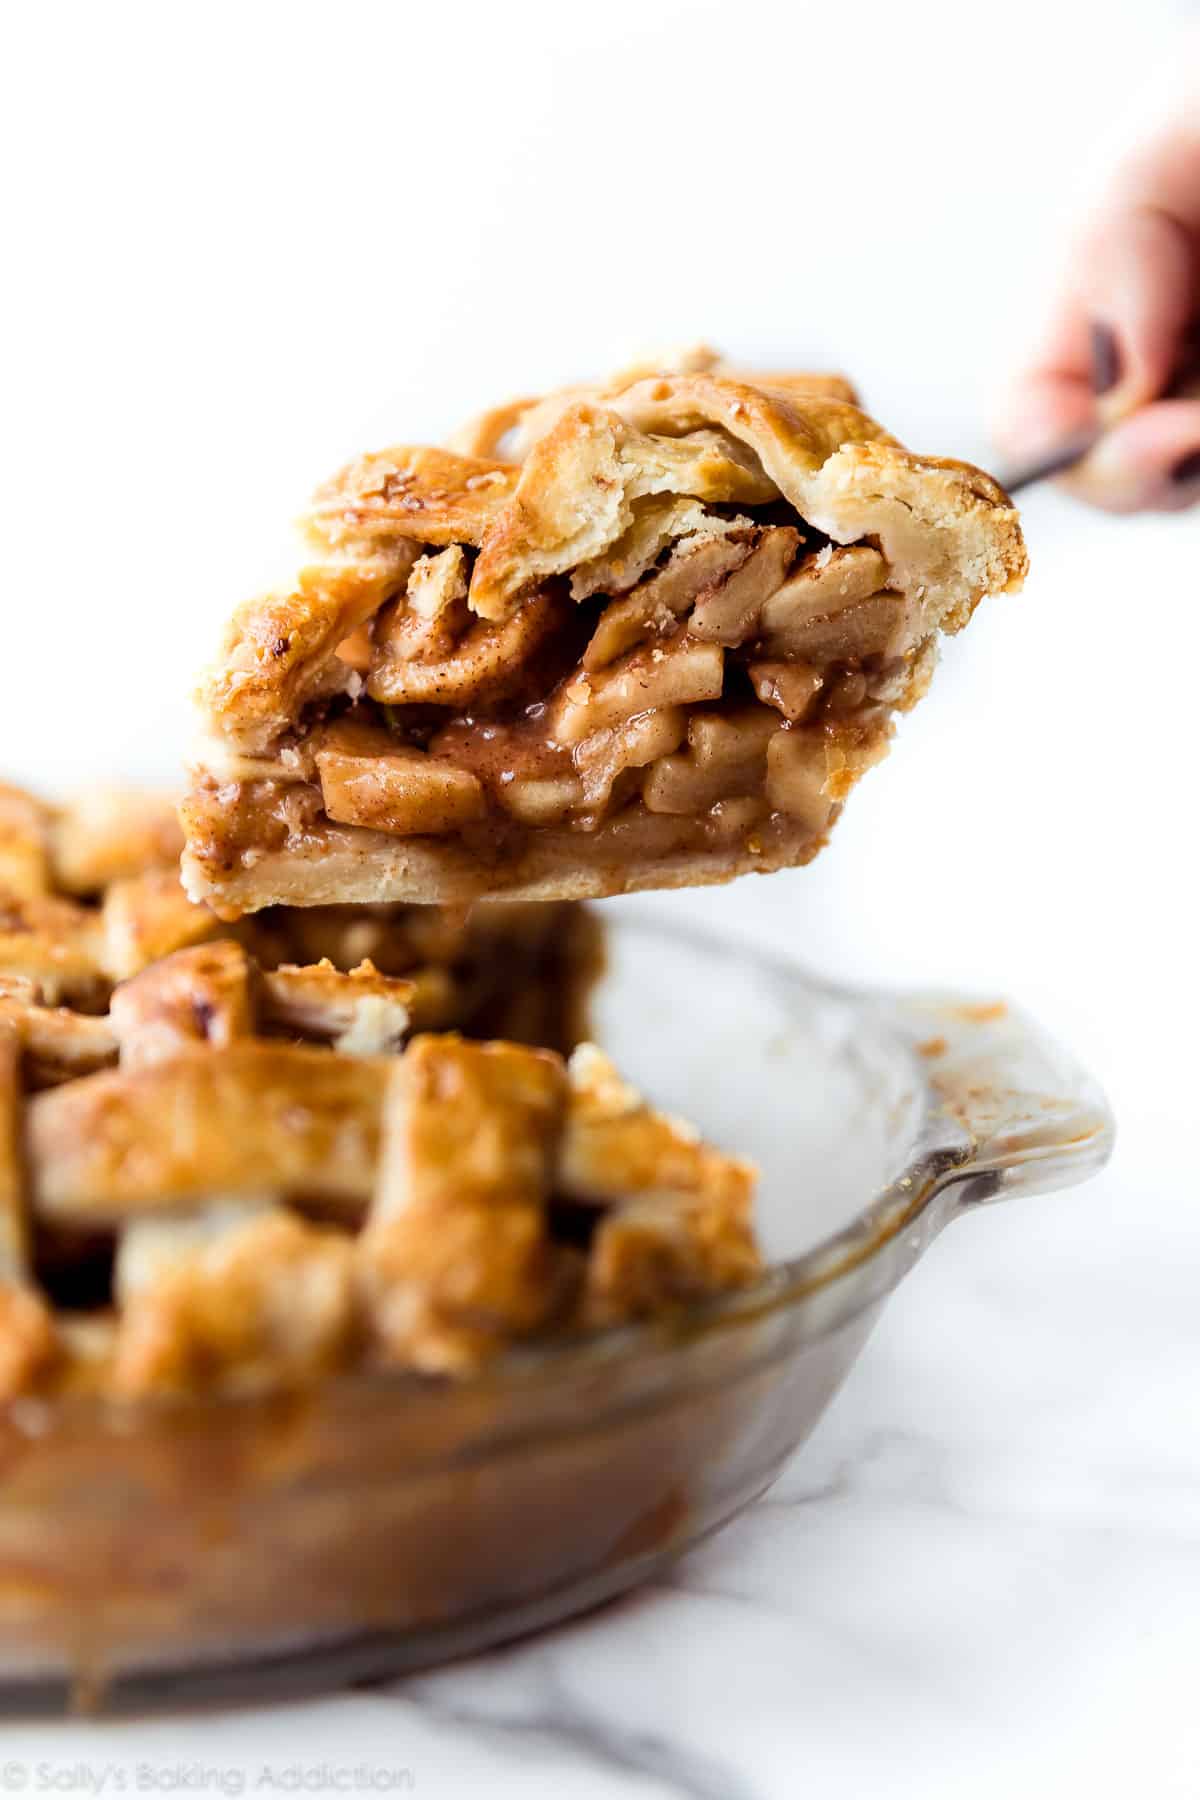
Only 5 Ingredients in Butter Pie Crust
This pie crust is made with 5 ingredients. Each ingredient has a very specific job. And with so few ingredients, it’s important to use the best quality.
- Flour – The structure of pie crust.
- Salt – Flavor flavor flavor. Use table salt instead of coarse salt. Smaller salt crystals dissolve and disperse more evenly throughout the dough.
- Granulated Sugar – Pie crust should not be sweet, but adding a little sugar to butter pie crust improves its flavor and enhances browning. The sugar crystals also help break down the hard pieces of butter.
- Cold unsalted butter – Supplies the pie crust’s unbeatable flavor and flaky texture. Use unsalted butter. The amount of salt in different brands’ salted butter varies, so for better control over the flavor, it’s best to begin with unsalted and add your salt.
- Ice water – The final ingredient, about 1/2 cup of ice cold water holds all the ingredients together. Use just enough so the dough holds its shape when rolling out. Many pie crust recipes don’t call for enough ice water, giving you a dry pie dough that cracks when you roll it out. When in doubt, add a little more water. You’re better off with more water (wet pie dough) than not enough water (dry, cracking pie dough) because you can always work more flour into the dough, but you can’t really add water to the pie dough when you’re trying to roll it out.
I use this crust in my apple cheddar pie—there I add some sharp cheddar cheese. It’s also the starting point for chocolate pie crust that we use for chocolate pop tarts!
Basic Pie Crust Steps
- Mix dry ingredients together.
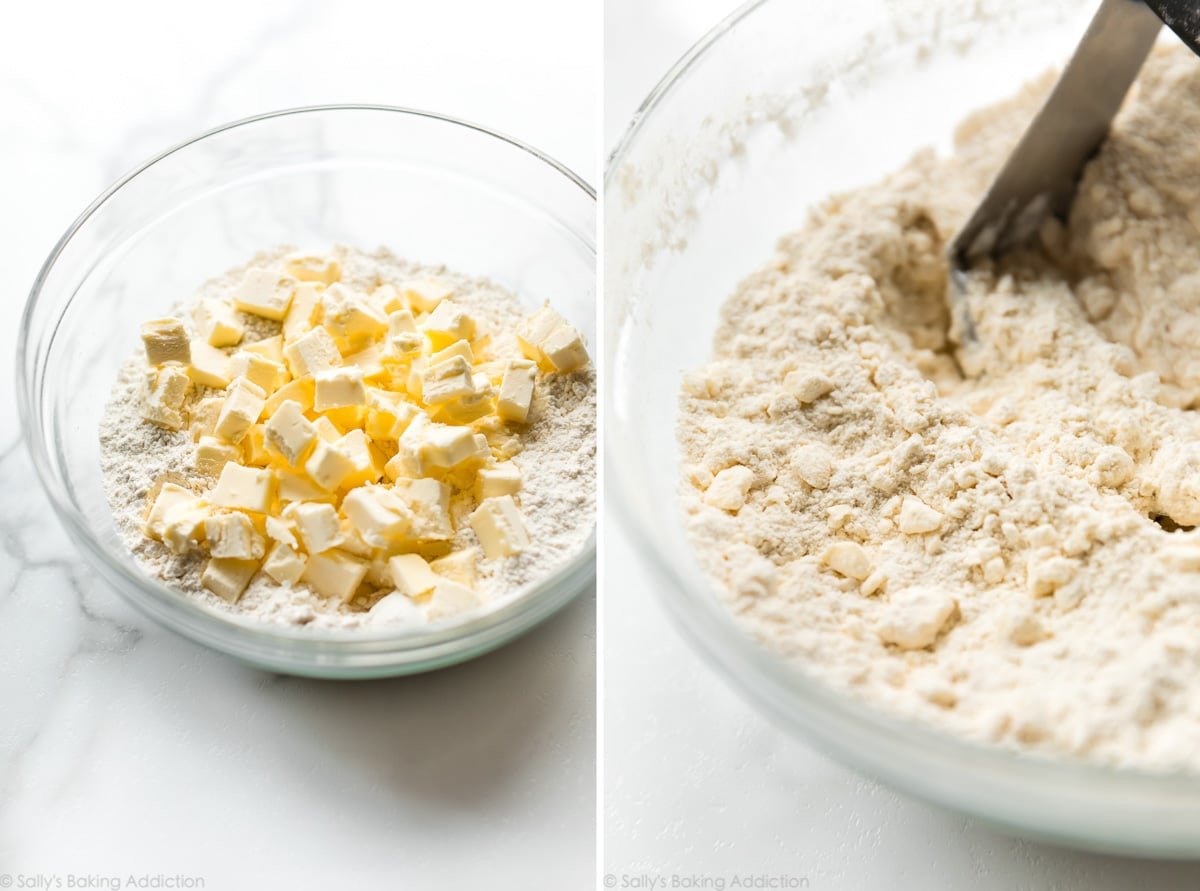
- Cut in the butter with a pastry cutter or food processor.
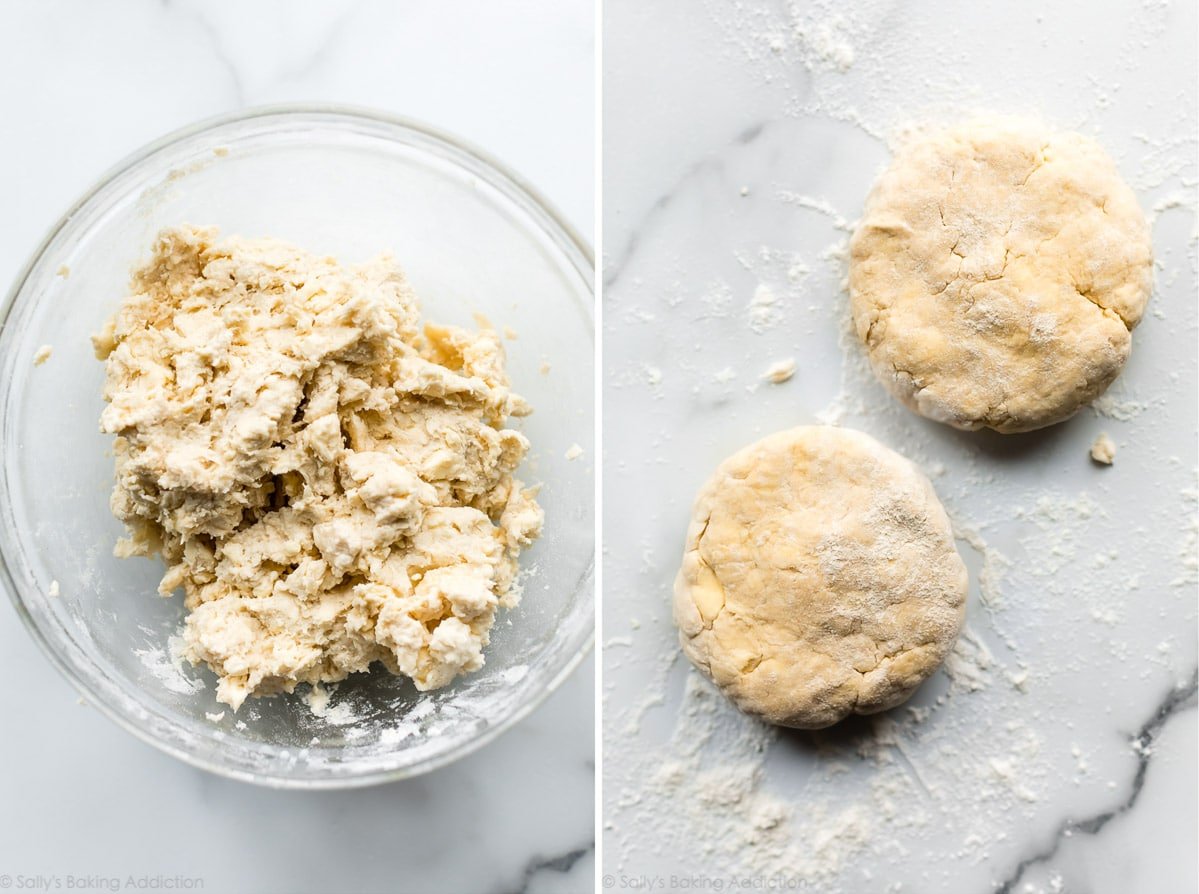
- Add ice water a little bit at a time until the dough begins to come together. It will feel thick and moist, not overly wet. You’ll use around 1/2 cup (120ml).
- Mold pie dough into a ball.
- Cut in half. This recipe yields two 9-inch pie crusts.
- Flatten into discs. Wrap in plastic wrap.
- Chill for 2 hours before using.
These steps are shown in the video tutorial above and described in the recipe below.
Why the Emphasis on Cold?
Keeping your pie dough as cold as possible prevents the fat from melting too soon. Too soon = before the pie crust enters the oven.
- What happens when the pie dough is warm? The butter in the pie crust will melt before baking, which means you lose all the flakiness and structure. Warm pie dough melts into a pool of grease. You’ll have a hard, crunchy, and greasy crust instead of a beautifully tender flaky crust.
- What happens when the pie dough is cold? The butter in the pie crust will melt inside the oven. Butter has a high volume of water content and this water converts to steam as the pie dough bakes. The steam separates the crust into multiple flaky layers, making this the most delicious pie crust ever.
The colder the dough, the flakier the pie crust.
How to Keep Pie Dough Cold:
- Use ice cold water. Fill a glass with 1 cup of water, add ice. You only need 1/2 cup of water in this butter pie crust recipe, but have a little extra just in case.
- Use cold butter. I keep some of my butter in the freezer and transfer it to the refrigerator a couple hours before beginning the crust. The butter is part frozen and very cold.
- Chill the pie dough for at least 2 hours before rolling out. This step is non-negotiable; it’s the most crucial in the entire pie crust recipe.
- For extra insurance, chill your flour and your mixing bowl in the refrigerator or freezer. Sounds a little silly, but trust me… it really helps!
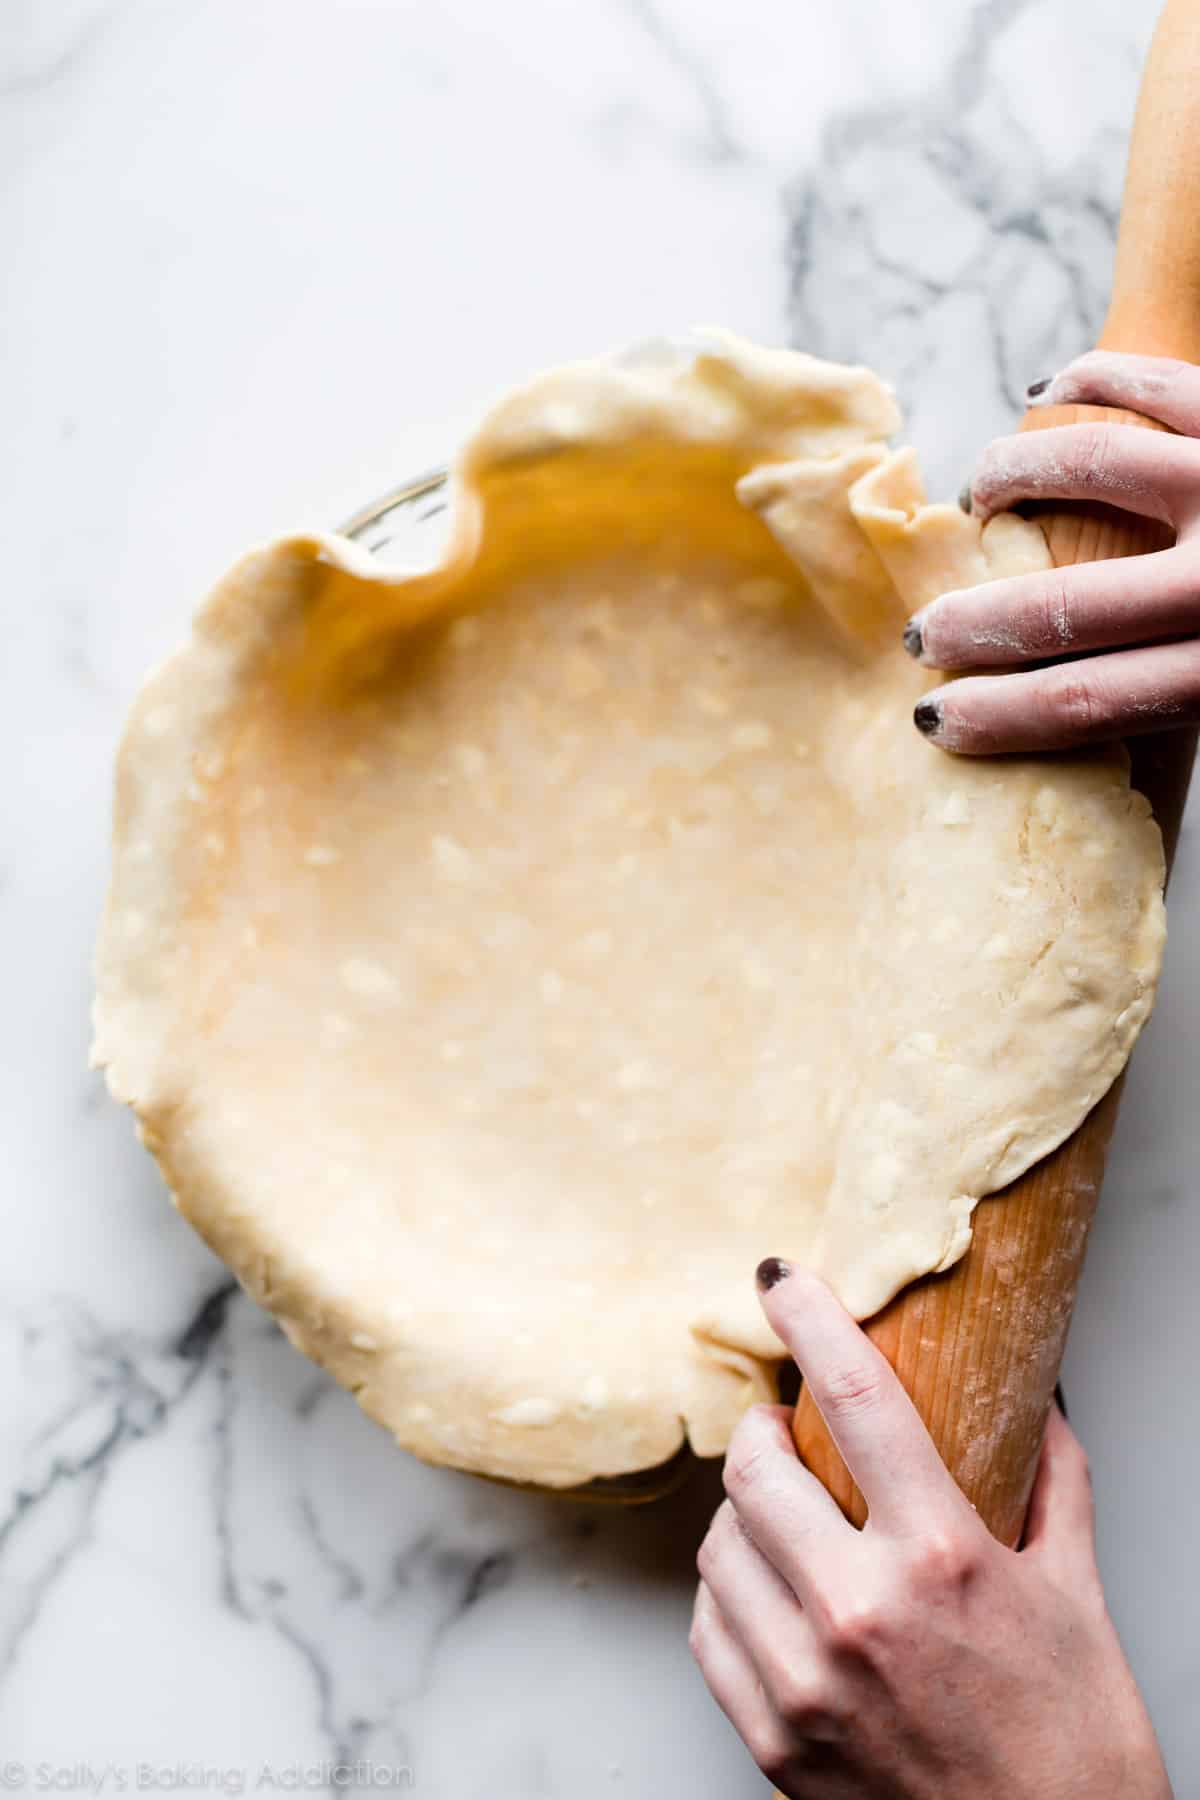
How to Roll Out Pie Dough
After the dough has chilled, it’s time to roll it out. Keep a small bowl of flour nearby to keep your work surface, rolling pin, and hands lightly floured. This prevents the pie dough from sticking. When rolling pie dough out, always start from the center and work your way out in all directions, turning the dough as you go. If the pie dough feels too warm or the butter is melting, stop. Lift it up, place on a baking sheet, and chill in the refrigerator for at least 10 minutes before continuing.
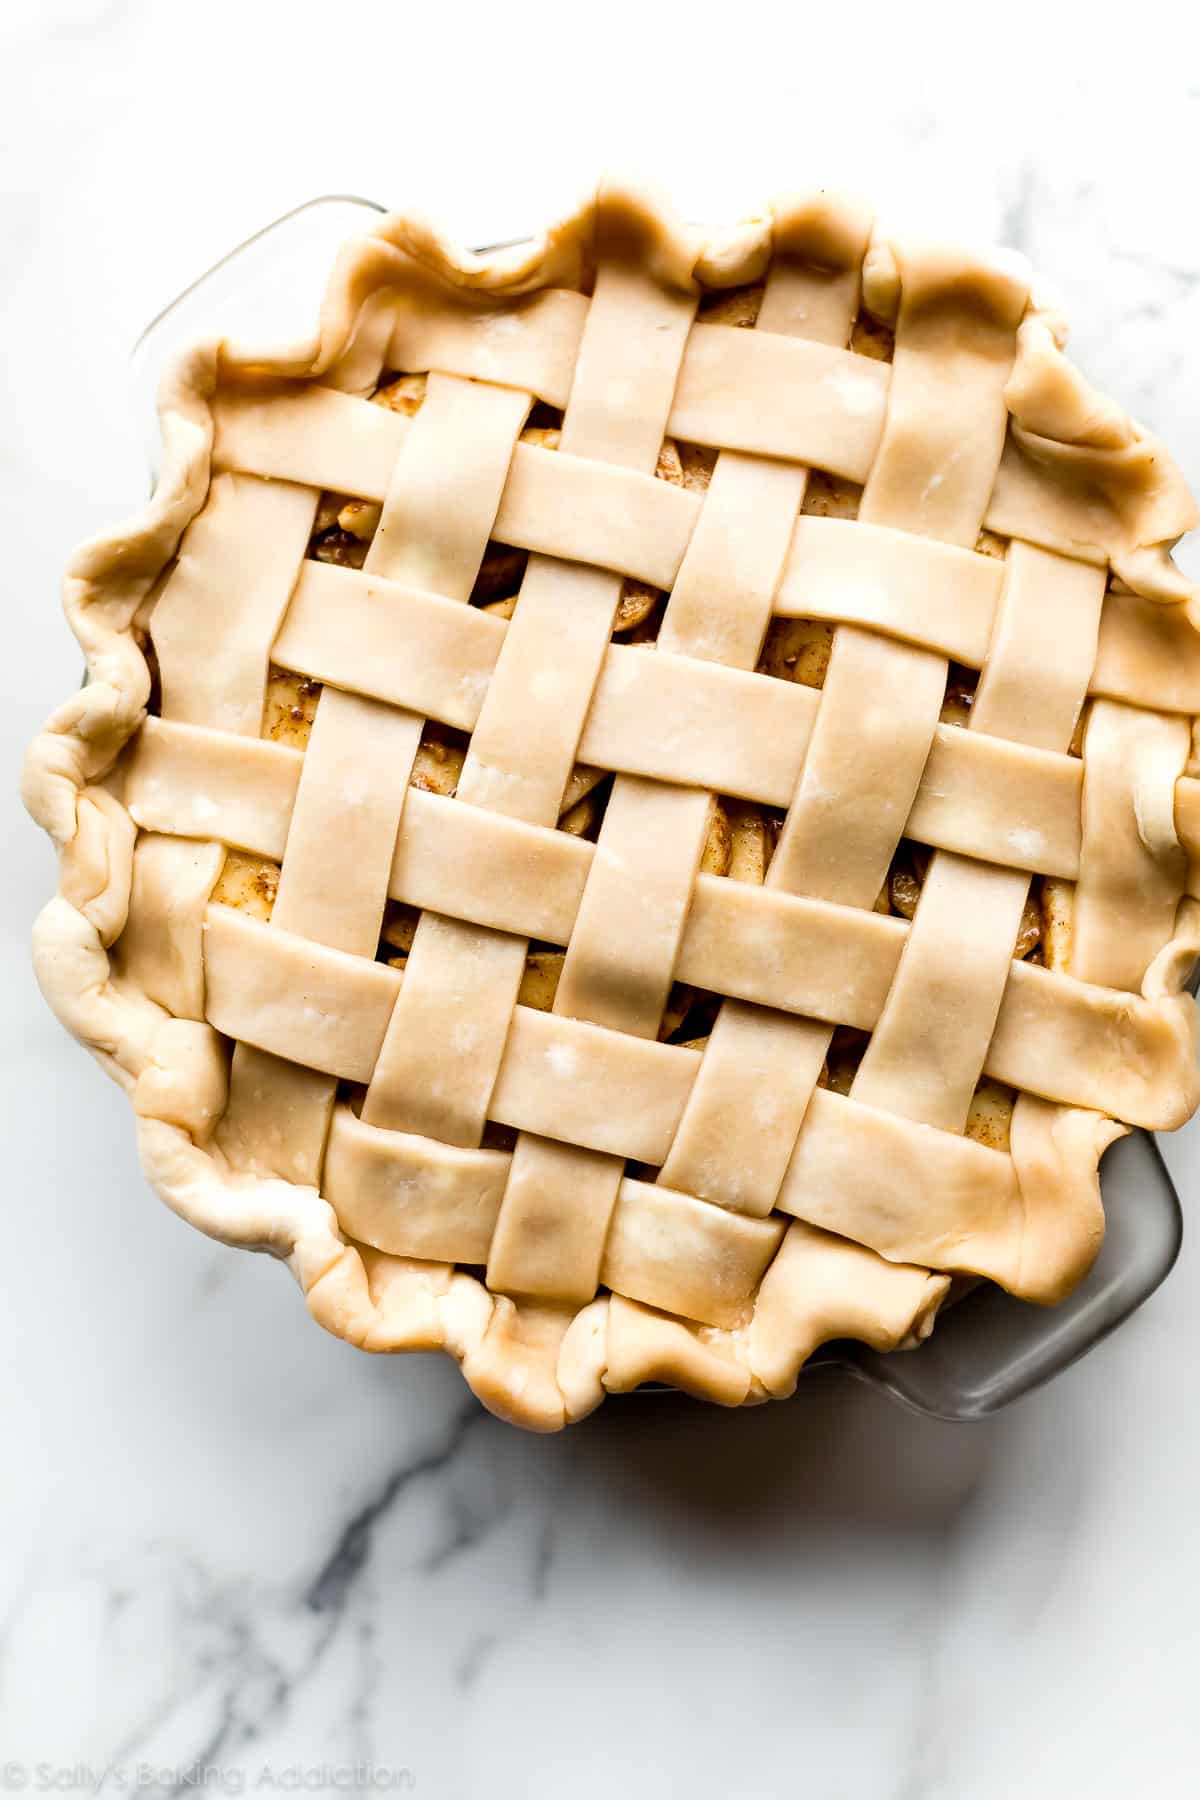
Butter Pie Crust Tips
- I’m going to repeat myself here. Keep all pie crust ingredients cold. On a hot day, you can chill the measured out flour in the refrigerator or freezer before starting. When taking the pie crust out of the refrigerator to roll out and fill, make sure your pie filling is ready to go. If not, keep the pie crust in the refrigerator until it is.
- Glass pie dishes are best. Why? As opposed to ceramic or metal pie dishes, glass pie dishes conduct heat evenly, which allows the bottom of the crust to bake thoroughly. Also, you can see when the sides and bottom of the crust have browned.
- If your pie recipe requires pre-baking (blind bake pie crust)—let’s say you’re making a pie with an especially wet filling—use pie weights or dried beans. Without pie weights, the pie dough will puff up, then shrink. Whichever you choose, be sure to line the crust with parchment or aluminum foil, then fill the empty pie crust with the weights. See my post and video tutorial for how to blind bake pie crust.
- Always use a pie crust shield. A shield keeps the crust edge covered, which protects it from browning too quickly or worse, burning. Use an adjustable silicone pie crust shield that you can fit to the size of your delicate pie crust. Metal can break the crust. Alternatively, you can cover the pie with a piece of aluminum foil. Cut a large circle in the center of the square so the center of the pie is exposed.
- Learn how to braid pie crust with my how to braid pie crust video tutorial.
- Learn how to lattice pie crust, too.
- Last but not least, learn how to crimp and flute pie crust. Those pretty decorative pie crust edges add function and flair!
Pie Crust Troubleshooting
- Prevent a crumbly pie dough that rips and tears when you roll it out. Make sure you use enough ice water when preparing your pie dough. Too little water creates an unworkable dough.
- Prevent a tough pie crust. Tough crusts are the result of not enough fat in the crust, as well as overworking the dough. Use the all butter pie crust recipe or my shortening and butter pie crust recipe to ensure a flaky, tender pie crust. Additionally, don’t work the dough too much.
- Prevent a burnt crust with a pie shield. See above.
Recommended Pie Crust Tools
(All my recommend products are affiliate links. I trust these tried-and-true tools!)
- Pastry cutter – Though you can use a food processor to make this butter pie crust, I strongly recommend a pastry cutter to avoid over-mixing. Food processors are quick to over-work pie dough.
- Pastry mat – I prefer rolling pie dough out on a lightly floured counter because countertops are usually colder, but you can use a lightly floured pastry mat instead.
- Rolling pin – An obvious must with pie dough! I also love this marble rolling pin. Marble rolling pins are usually cooler to touch and we all know that pie dough loves the cold.
- Glass pie dish – My mother-in-law bought me this Pyrex pie dish 5 years ago and it’s been my go-to ever since. I have 4 of them now! Like I mention in my pie crust tips above, glass pie dishes conduct heat evenly, which allows the bottom of the crust to bake thoroughly. This is important. There’s no comparison, Pyrex is the best.
- Pizza cutter or pastry wheel – To cut your pie dough into strips for lattice decoration or any decoration. Have you seen my pie crust designs post?
- Pastry brush – An egg wash is simply an egg mixed with milk or water (usually milk). Lightly brush the pie dough with an egg wash using a pastry brush. The egg wash creates a golden, shiny, crisp crust. Without it, pie crust is dull and lacking color.
- Pie weights – These are crucial when you blind bake pie crust for no-bake or custard pies. Note: 2 packs of these pie weights is definitely needed!
- Pie crust shield – Pie crust edges are usually higher up than the center of the pie, leaving them exposed to the most heat. They brown quicker than the center of the pie, so it’s important to protect it with a shield. I usually place a pie crust shield on the pie about halfway through bake time. I recommend an adjustable silicone pie crust shield that you can adjust. Or you can cover the pie with a piece of aluminum foil: cut a circle in the center so the center of the pie is exposed.
Pie Recipes
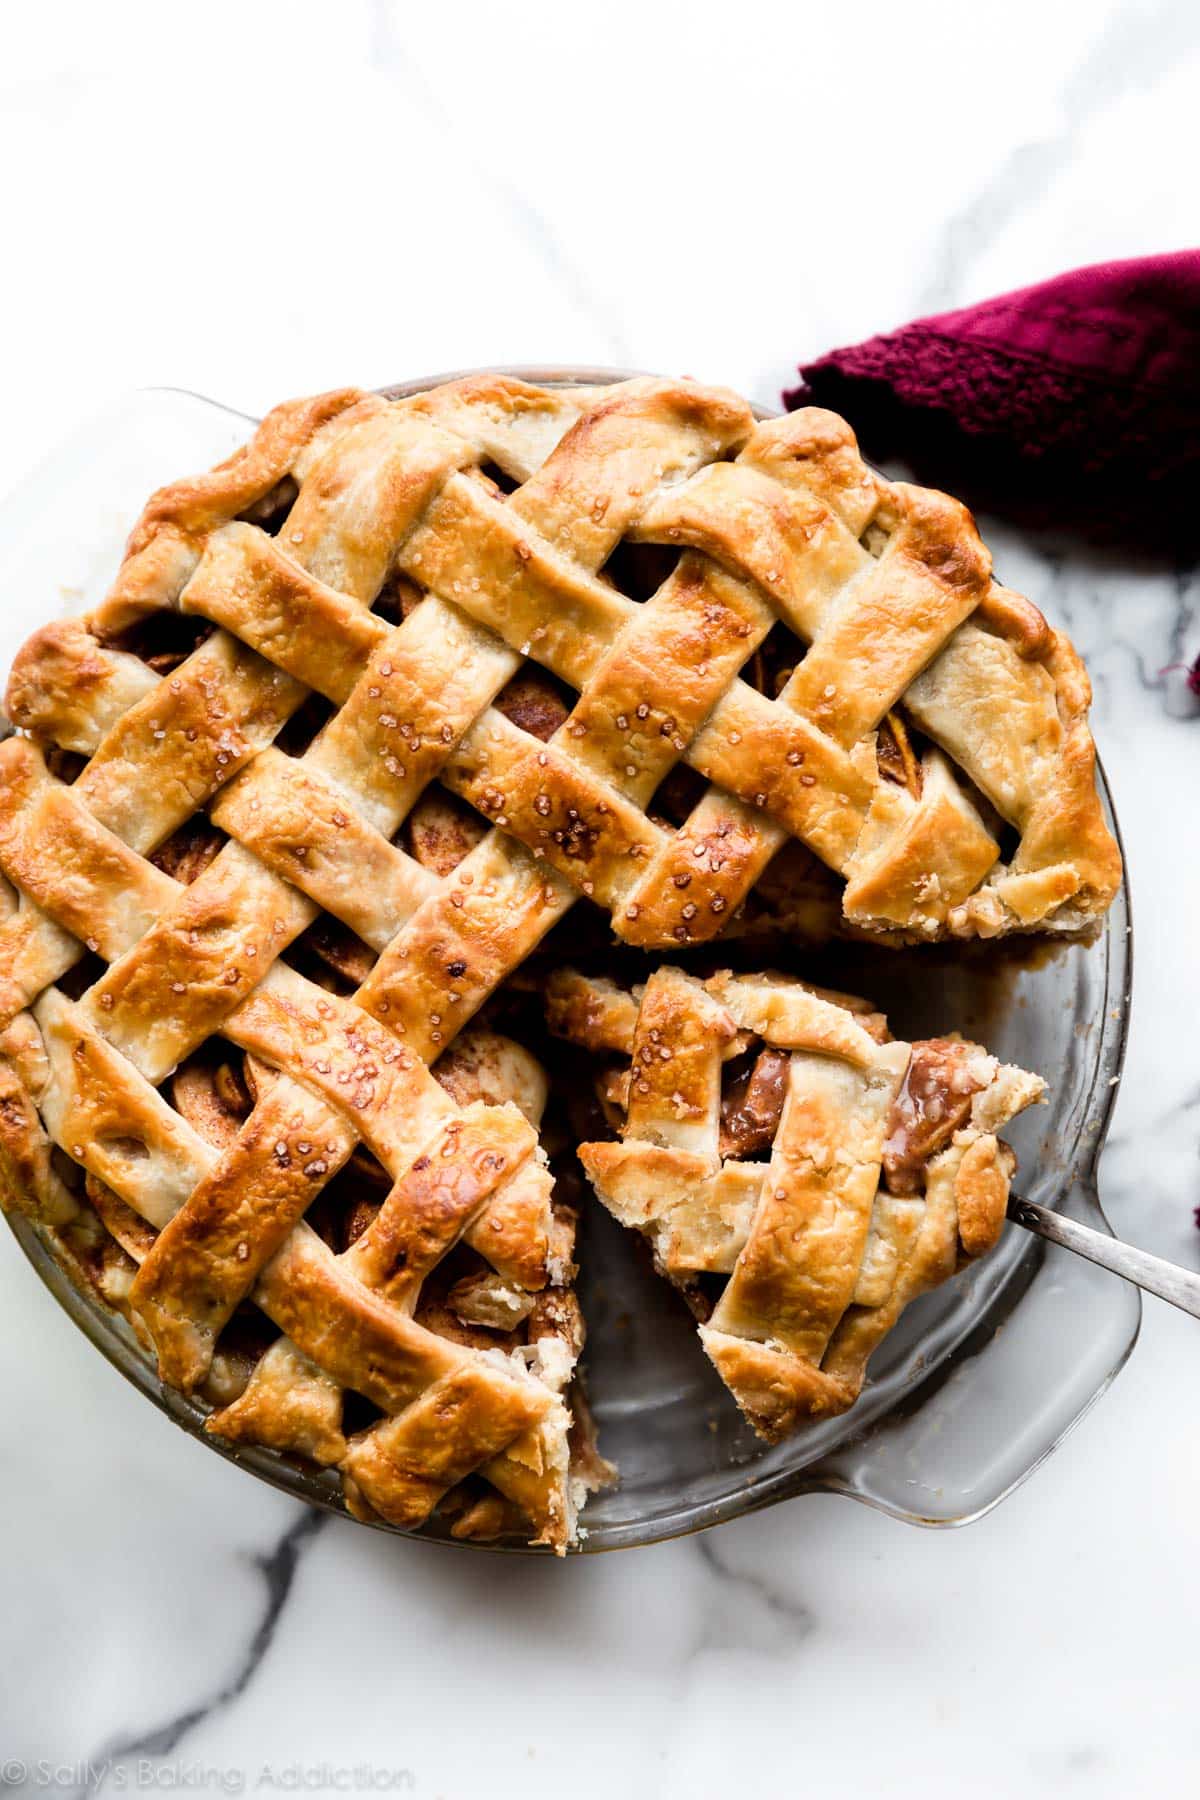
Now that you’re fully prepared and equipped, here are several pie recipes to use your all butter pie crust. Pictured is my chai spice apple pie and I topped it with salted caramel in the video.
- Traditional Apple Pie & Salted Caramel Apple Pie
- Lemon Meringue Pie (a blind bake pie crust recipe)
- Caramel Pear Pie
- Pumpkin Pie
- Pecan Pie
- Banana Cream Pie (a blind bake pie crust recipe)
- Cherry Pie
- Peach Pie
- Blueberry Pie
- Sweet Potato Pie
- Fun recipes: Apple Hand Pies, Brown Sugar Cinnamon Pop Tarts, Pecan Pie Tarts
- Or any of my favorite Thanksgiving pie recipes!
All Butter Pie Crust
- Prep Time: 20 minutes
- Cook Time: 0 minutes
- Total Time: 2 hours, 20 minutes
- Yield: 2 pie crusts
- Category: Pie
- Method: Baking
- Cuisine: American
Description
Follow this simple recipe and video tutorial for the best all butter pie crust. It will make you a pie expert immediately! Complete with all my tips and troubleshooting, this pie crust recipe is buttery, flaky, and tender with the most incredible flavor.
Ingredients
- 2 and 1/2 cups (313g) all-purpose flour, plus more as needed (spooned & leveled)
- 2 teaspoons granulated sugar
- 1 teaspoon salt
- 1 cup (16 Tbsp; 226g) unsalted butter, chilled and cubed
- 1/2 cup (120ml) ice water, plus more as needed
Instructions
- Mix the flour, sugar, and salt together in a large bowl. Add the cubed butter on top.
- Using a pastry cutter, food processor, or two forks (pastry cutter is ideal, see post above), cut the butter into the dry ingredients until all flour is coated. You’re looking for pea-sized bits of flour coated butter. A few larger bits of butter is OK.
- Measure 1/2 cup (120ml) of water in a cup. Add ice. Stir it around. From that, measure 1/2 cup (120ml) of water since the ice has melted a bit. Drizzle the cold water in, 2 Tablespoons (30ml) at a time, and stir after each addition. Stop adding water when the dough comes together easily and begins to form large clumps. The dough will feel moist and a little sticky, but not feel overly wet. Do not add any more water than you need to. I always use about 1/2 cup (120ml) of ice water.
- Place pie dough on a lightly floured work surface. Using floured hands, fold the dough into itself until the flour is fully incorporated into the fats. Form it into a ball. Divide dough in half. Using your hands, flatten each half into a 1-inch thick disc.
- Wrap each disc tightly in plastic wrap and refrigerate for at least 2 hours and up to 5 days before using in a pie recipe.
- When rolling out the chilled pie dough discs, use gentle force with your rolling pin. Start from the center of the disc and work your way out in all directions, turning the dough with your hands between rolls. Smooth out the edges if you notice cracks. (See video above.) Keeping your work surface, rolling pin, and hands lightly floured makes rolling out easier.
- Proceed with the pie per your recipe’s instructions.
Notes
- Make Ahead Instructions: Prepare the pie dough through step 4 and freeze the discs for up to 3 months. Thaw overnight in the refrigerator before using in your pie recipe.
- Special Tools (affiliate links): Glass Mixing Bowl | Pastry Cutter | Silicone Spatula | Rolling Pin | 9-inch Glass Pie Dish | Pizza Cutter or Pastry Wheel | Pastry Brush | Pie Weights | Pie Crust Shield
- Pie Crust Comparison: Let’s see how this all butter pie crust recipe compares to my favorite buttery flaky pie crust, which uses a mix of shortening and butter. Due to butter’s high water content, this all butter pie crust is lighter textured with more defined flakes. As the crust bakes, the butter’s water converts to steam, creating thousands of deliciously light flakes. It’s also so buttery! However, because of all this butter, I find that the shortening and butter pie crust is a little easier to work with. Shortening has a higher melting point than butter, so the crust holds its shape wonderfully. Both crusts are fantastic, but if you are looking to make intricate pie crust designs I highly recommend my buttery flaky pie crust.
- Try This: Replacing 1 Tablespoon of ice water with cold apple cider vinegar creates an even flakier, more tender pie dough. It’s so tasty. Try it!


This is my go to pie recipe. It comes out so flaky! I have used it for the Chicken pot Pie, Strawberry pie, and holiday pies as well!
I don’t see, other than how much water, and measurements. It loos wonderful though.
I really enjoy your recipes. Thank you so much. I would like to make a lemon and chocolate filling for the pop tarts. Is there a special way to bake these? Lemon is one of my favorites.
I am going to be making pop tarts for my grandchildren and of course
Hi Julia, here is the recipe for our Homemade Chocolate Pop Tarts. We haven’t tried a lemon filling!
Hi, would 1 crust be enough to make the top and bottom of a 6-7” apple pie?
Hi Meghna, it should be just about perfect for a 6 inch pie.
Tasted really good and nice and flaky!
I used kerrygold salted butter and would do so again.
Thank you Sally! I bake a lot but have completely avoided pie making after so many bad crusts..This really opens the door for some fun, new baking!
Wonderful recipe! I made it in a food processor which was very simple. The dough was delicious, light and flaky, and easy to roll out. I was using a heart-shaped tart pan and the dough held its shape in the fluted edges of the tart pan very nicely and looked wonderful.
The amount of water called for (120 mL) was far too little for me, I used closer to 180 mL. I wonder if that caused some people issues. If you live in a dry area, like me, you may need to add quite a bit more water.
Adding too much water can make the crust “tough”. It should just barely come together. You don’t want it “wet”.
This turned out very difficult to cut. I’m disappointed in it.
Will this be too sweet for a chicken pot pie? Should I omit the sugar?
Hi Daryl, this pie crust works well for savory recipes, too. No need to omit the sugar—the crust isn’t sweet.
Best pie crust recipe I have tried! Used to make 2 quiches for Christmas and got many compliments on how light and flaky the crust was. Will definitely be making again for future sweet and savory recipes.
I was so bummed, I have loved all the recipes I have used from you so far. I changed up and used the all butter pie crust recipe for the French silk pie. It rolled out beautifully, it baked beautifully, you could tell it was nice and flaky in a few spots that it puffed up in that I didn’t get weighted down enough during the baking bake. But after filling and chilling with the French silk filling it was the toughest pie crust ever you could hardly cut through it.